Sunday, April 20, 2008

Sewing Workshop Mission Tank

I have written entries about other TNT patterns that I've worked with time and time again. After a few questions posed about the Sewing Workshop Mission Tank, I decided to share how this one came to be a TNT for me.

This is the pattern:
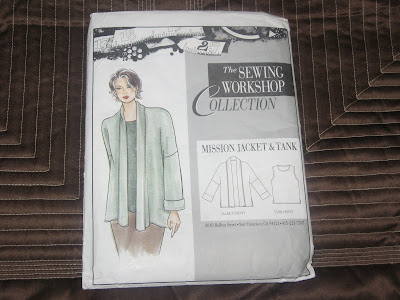

I found the pattern when I went to a sewing expo in Worcester, MA at the Vogue Fabrics booth. I had just come from a class with Fred Bloebaum and she was selling her patterns at the booth. In my mind, I was going to purchase two of her patterns, and I did (which btw I still haven't sewn!) when I saw this pattern. At the time I was still on the search for the "Great Tank Pattern".

After three children, I didn't necessarily have a lithe, young body anymore and was starting to dress to cover some areas of my body rather than expose them. I had stopped tucking in tops and needed one that would give me style but flatter my larger than I liked abdomen. Thus began the search for the great tank pattern...the one that would fit, flatter and work easily into my work wardrobe.

Since I am not a huge fan of indy patterns, I kinda stumbled onto this one. I saw several made up in the booth at the expo and thought, "Why not?" Famous last words...since this is one of my all time favorite TNT patterns. I will admit that the first few attempts at making this pattern were barely wearable. I made wrong fabric choices. The fit wasn't great. I didn't really have a vision yet...but I preserved and continued to work with it.

First, the pattern contains 4 pieces ~ a front piece, a back piece which are both cut on the fold and two binding strips...one for the neckline and one for the armholes. A very simple piece...however, it contains no darts...so on a plus size woman that's like wearing two big ole pieces of fabric...making you look like you are wearing either a tent or a very short muu-muu. I ain't no muu-muu girl.

When I began working with this pattern I should have been discouraged because the first few pieces weren't that great, but for some reason I was intrigued...and then I decided to make changes to the pattern. The first change I made to the pattern was to remove the excess fabric around the dart area...no I did not do a FBA (full bust adjustment) wasn't on my radar yet...I just sliced the pattern at the armhole and overlapped the pieces to form a dart. Now I don't know if this is "good" patternmaking or not but it took care of that excess fabric hanging out in the armhole area and gave me a better defined bustline.

This was the last version of the tank that I made with the binding at the neckline and sleeves...it was a part of a collection called "The Burda Six"


After that I got really bold with the pattern...I added a center back seam. I stopped using the binding pieces. I omitted the vents and added some more width to the bottom of the tank. I changed the neckline - giving it a lower more u-shaped neck. Then I started experimenting with knits because this tank pattern was designed for wovens.

My first experiment with knits was a single cotton knit purchased from Fabric Mart that I used as part of another collection and also as part of a twinset...I think this was its first incarnation as a 2 piecer...


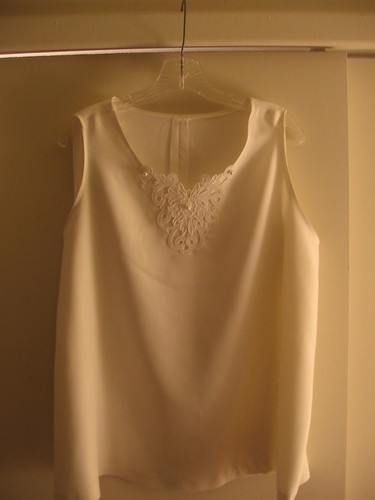
A simple basic top with the neckline and armholes turned down and stitched, the neckline altered to have more of a v-neck, that center back seam and it cut just a little closer to the body to allow for the fabrication of the knit.

I have now made this top about 15 times. It has appeared in every SWAP collection I have sewn, most prominently featured in my last entry in the 2007 Timmel SWAP contest, the "Corporate Chic" collection.


This pattern is so versatile that I have made it in everything from all kinds of knits (single cotton knit, rayon knit & the beautiful St. John knit), to a cashmere/wool blend, silks (sueded, twill, woven), linens and embroidered cottons.

Now we come to this pattern's present evolution ~ the bow-tied tank. About 18 months ago, I switched jobs from a busy casual environment to a more corporate atmosphere. My clothing requirements changed drastically and I have spent the last 18 months sewing at a break neck pace to have enough garments to wear for all office occasions. I am finally at the place where I can stop and breathe and part of the reason is this tank top.

Somewhere and I don't know where I saw one similar to this latest incarnation. It could have been in a magazine or catalog...on a website or even on the street...but somehow the look stuck in my mind. I thought I could make one more morph or adjustment to the SW Mission Tank to accomplish this look...and it worked! Boy did it work! Here's a picture of my three latest versions of the SW Mission Tank with a bow tie:


This was a simple alteration...the neckline had already been changed from the straight u-neck to more of a v-neck.

• I added ties by cutting long rectanges 3" wide by 30" long.

• The tie was then sewn to the neckline leaving a 2" opening at the u-neck.

• At the ends of the seams, a piece of rayon seam tape is sewn to the pieces to provide some support.

• Then the seam is pressed up.

• The other end of the tie is sewn down from the right side of the fabric by stitching in the ditch.

• The 2" front piece is clipped at either ends and sewn down.

• The tie is either folded onto each other and stitched down or sewn right sides together and then pulled through using some hand stitching to finish off the edges.

That was it! A new version of the SW Mission Tank was born...and I must admit my favorite version of it so far.

A final picture of a dozen or so of the working pieces in my closet...


I know its redundant, probably a little excessive but it works so well in my wardrobe that I will continue to make more of these tanks. Hopefully, you will find a pattern that you love, that works well in your wardrobe ~ whatever your lifestyle, and will bring you as much sewing joy as this one has brought me!

Saturday, April 19, 2008

How long do you age your fabrics?


It's Saturday morning...the sun is shining and there is a nice breeze blowing through my kitchen window. I so adore the first days of spring when the weather has that soft, gentle breeze flowing through the days...so I am up and on the computer reading all of the blogs that captivate me in sewing blogland. This phase stopped me dead in my tracks! "These fabrics don't get to age like some of my other fabrics." from Linda's blog - Danvillegirl Sewing Diary.

It sent my mind spiraling in several directions:

My first thought:
I only age basics. You know the fabrics that you buy in solid colors to always have in your collection, so that when you need basic pieces you always have fabric on hand to sew them.

Second thought:
Gosh, do I have a lot of basics in a lot of colors! *LOL*

Third thought:
I am ageing a lot of fabric, probably at SABLE proportions!!!

Which leads to this post and this question..."How long do you age your fabric?" See I never buy fabric with the intent that it will hang out in the collection for years upon years. And I never buy fabric without an inspiration or a desire to make something from it. But somehow between the buying and the actual construction, some pieces can wait years for their turn to see the light of day, or spring, summer, winter, fall! *LOL* Sorta like an airplane stack at a busy airport - where the planes keep circling and circling until its their turn to land.

And then some fabrics arrive - either by delivery or by my hand - and they go through the prewash system before the bag's warmth on the fabric is even cold. Then they get plunked down onto the cutting table and stitched and sewn right away! How do they get preferential treatment over a studier basic piece?!

Also, there are those impulse buys...some of which get stored and retrieved years later, that make me wonder, what was I THINKIN' when I bought this? Many times it just gets put back on the shelf with the hope that I will think of something to do with it in the future! Is this you? Do you do any of this, too?

Now I know there is a portion of the population that doesn't store/stash or collect fabric. Again, you are an amazing person to me because I just can't live my life without a good collection of fabric around me (sorta like the books I'm also collecting!)...so I'm guessing that you don't age fabric.

But to anyone else reading my ramblings this fine spring day, "How long do you age your fabric?"

************************************

And a postscript to Thursday's entry...

First thanks for all the interesting comments, but I need to amend my post to say that I haven't totally slipped over to the dark side of no planning...'cause I truly love to plan! My creative spirit is just saying, no planning this season. Let's just take the journey and see where it leads. I'm sure my reliable creative senses will reassert themselves with the first whiff of cooler air and want to plan out a fall/winter wardrobe. So don't rejoice just yet, you non-planners, I think I'm just testing the waters and taking a much needed break!

Thursday, April 17, 2008

The Year Without A Plan

I love sewing blogland! I love the inspiration it provides through garments made, techniques discussed and fabric and pattern choices shared.

Lately spring/summer sewing ideas, thoughts and plans are showing up on a lot of the blogs I read. And it is wonderfully stimulating to read about each sewist's process and what they hope to make and achieve this season.

However, all of this makes me think about my own plans...and it hit me...I don't really have any plans. Yes, there are some things written down on a piece of paper that I would like to make but if I get to them fine and if I don't fine. Also, I've noticed that when I post an entire list of plans or do a blog entry about what I want to make, it seems like it doesn't all come to fruition...almost like I was satisfied just making the list or writing the blog entry...strange...

So this spring/summer season...I am going to sew as I feel it...wherever the sewing muses take me...whatever inspires me...whatever I feel I need to have in my wardrobe THAT's what I'm going to make...I am going to be the anti-planner! *LOL*

Seriously though, I think I spent so much of last year planning, following a plan, abiding by a list that this year my creative spirit is just crying out to be free...to sew whatever it wants! So...I will be avidly following what others are making! Cheering you on as you check off item upon item on your list! Unabashedly admiring your determination, your progress and your new wardrobes...while I will sew as the spirit moves. I will make whatever I need to fill a hole in my wardrobe. I will wander down a path I never took before because it wasn't a part of my plan...and I won't make a "sewing list!"

Yeap I'm free-stylin' it! Stay tuned 'cause I haven't the faintest idea what happens next!!!! *LOL*

Monday, April 14, 2008

Sew News Inspiration

A couple of days ago I picked up the April/May edition of Sew News. I was pleasantly surprised at home much I enjoyed this issue.

Of course the article, "One Pattern, 3 Look's" caught my eye first! This article is well written and photographed. It will encourage you to use your pattern as a jumping off point and to dream of many different looks for your pattern.

The article has great diagrams showing how to cut up and change a pattern. And as a TNT pattern fanatic, who is constantly reimagining her patterns, I loved this article.

Another article is called, "Three of a Kind" where three different Sew News staff members used the same skirt pattern but came up with three different looks. Each look fits the sewist's lifestyle and figure, but really highlights how everyone should make a pattern that works for them and not just copy what's on the cover of the pattern envelope.

Also included an interview of Carmen Webber, Season 4 Project Runway contestant was interesting especially since Carmen wasn't on PR long enough to become a fan favorite! The article was informative and showed several of her designs.

The last article worth mentioning is called, "Neckline Redefined" which gives you in-depth instructions on how to alter your pattern's neckline. Since I've altered a neckline or two on both tops and dresses this was very useful information...confirming some things I already knew and and also reinforcing some others!

Probably the reason I liked this issue so much is because it is all about encouraging you to experiment with your pattern, to dream up something new, to challenge yourself to step out of your comfort zone and do something a little different! If you are not a subscriber or you don't regularly pick-up Sew News, but you are looking for a resource that will assist you in becoming more proficient in "interpreting" and "changing" a pattern...this issue is for you!

I was pleasantly surprised and thrilled with the entire issue! So if you can, please pick one up!

Sunday, April 13, 2008

A Couple of Tops

Saturday morning dawned bright and early and I woke up ready to sew. And I knew just what I wanted to make...

See two weeks ago I had a horrible, horrible week - from Monday through Friday there wasn't one day that something in my personal life didn't go wrong...don't ask, I ain't gonna tell you! *smile* However, I did share with a good friend what was going on and a few days later this arrived in the mail!


It was the perfect gift to lift my spirits! And I had to wait until this weekend to use it! There was just enough fabric for it to become this twinset (worn with the skirt from the Easter Suit).


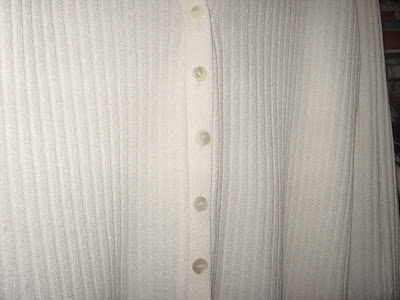
The pattern is my TNT Burda Cardigan along with the Sewing Workshop Mission Tank. The cardigan is made from the ribbed knit and the tank from a smoother knit. The smoother knit was also used for the sleeve bands and the neck/front bands for the cardigan.

Some 2-hole mother of pearl buttons from the collection were added to the front to finish it off. The buttonholes were a little difficult to make on this fabric. My sewing machine just wanted to eat the knit, but I pinned a little lightweight pattern paper to the back of the band. No more problems, the buttonholes sewed up great. I also made thread shanks for the buttons since they were flat 2-hole buttons. I know that this is a very simple technique but this time it worked wonderfully for each button that I sewed on.


I have fallen in love with the bowtied version of the Sewing Workshop Top. It works perfectly in my corporate work environment and it makes up quickly. So quickly that I also made another one this evening.

I used this rayon knit from Fabric.com:


It was the deal of the day last weekend so I picked up a couple of yards because I thought it would make an interesting twinset. I do have the coordinating cardigan cut out (with a few differences from the white one) and will finish that up next weekend. However the top works well as a single piece in my wardrobe right now.

So that's what I did this weekend what did you do?

And congratulations to all of you who have finished your SWAP garments! I can't wait to see the unveiling and what has been created!!!!


Friday, April 11, 2008

Yesterday I was at Kashi's


and I came home with nothing...nada...zippo! Now, Gaylen who I went to Metro Textiles to meet can't say the same! *LOL*


I first "met" Gaylen, author of the blog, GMarie Sews, on the now defunct Sewing World. We met in the Sharing and Inspiration folder that started there and migrated to Stitcher's Guild. But we really bonded over what Gaylen calls "the Carolyn Skirt." I forget why it ended up being named for me but it's really Simplicity 5914.

Several of us made the skirt then, encouraging each other to use new sewing techniques or to try different fabrics...I don't know why but at the time Gaylen and I just clicked. Once Sewing World disappeared we've mainly kept in touch through our blogs, but I promised her that if she ever came to New York we would go fabric shopping together.


(Okay this really bad picture was taken by JB with my camera. And I had to use it because I only took a few shots! Hey I thought it was a big deal that I remembered the thing!!!)

So yesterday Gay and her wonderful husband arrived in New York and we met up at Kashi's (Metro Textiles). Now I know you've all heard how Kashi "knows how to pick fabric just for you" but I have to admit that I was the final say yesterday in what was shipped to Gay's house. She was starting to get that "I can't believe there's so much fabric here! I must take ALOT home" look on her face. The look that means when you get home and the clouds of fabric euphoria have faded you go, "What was I thinking buying that!?!"

She still ended up with quite a few amazing pieces and I promised her husband that I would encourage her to sew it ALL up...he was trying to give time limits but we weren't falling for that one! *LOL*

After a wonderful dinner filled with great conversation and alot of laughter, I sadly headed to the Port Authority to catch a bus home and Gay and her DH wandered around NYC before meeting up with "The Princess"! I had a wonderful evening. It was fantastic to finally meet Gaylan and to put a face with a name!!!

Thanks Gay and JB for sharing such a great evening with me and I hope that when you speak of me, you will do so kindly! *LOL* What was the word? Oh yes, lovely! ROTFLOL!

Thursday, April 10, 2008

You say...I say...

You say, I say, but most importantly the pattern says...

There seemed to be some conversation in the comments section about whether the pockets are "faux welt pockets" or "slotted seams". And there was even a mention of a "strap seam", which btw, I have never heard of! So you guys sent me on a little quest...

See I anticipated the slotted seams comment because this is the pattern description,

"The front is cut in 3 sections with top stitching detail in seam."

Now technically this sounds like a slotted seam but in the drawings and execution it looks like a faux welt pocket...so that is how I described it. Because to me a slotted seam is a fully opened seam with a piece of fabric beneath it. In this version, only a small section of the seam is left open. The rest of the seam is sewn shut.

So some definitions and how to execute each seam...This information is taken from, "Modern Dressmaking Made Easy" by Mary Brooks Picken.


Slot Seam. Baste as for plain seam, but do not stitch. Press open. Cut lengthwise strip 1" wider than the seam allowances. Place strip directly under the seam, and baste it in place. Stitch each side an even distance from the basted seam line. Remove seam bastings, and the slot or "inverted slot" seam is complete.

And Summerset mentioned a Strap Seam. Stitch seam; press it open. Take true bias or lengthwise strip of fabric, twice the width finished strap is to be. Turn edges; fasten together with diagonal-basting. Use matching thread. This basting remains in. Press strap; baste over the seam; stitch along both edges. Remove top basting; press seam from wrong side.

The diagram in the book shows how each seam is sewn. However, Ann of Gorgeous Things made a perfect modern day garment with slotted seams. She wrote this post on The Sewing Divas blog about making a skirt with slotted seams. If you notice, Ann used a different color to make the slotted seams really stand out in her garment.

Need more information, Threads Magazine has a wonderful article on slotted seams called, "The Unforgettable Slot Seam" written by Jeffrey Mayer in Issue No. 75 - March 1998. In the article there is a wonderful example of a slotted seam with a pocket in it.

Now to me, the definition and how to sew explanation in the Mary Brooks Pickens book, the wonderful garment made by Ann, and the Threads article all seem to say, that a slotted seam is totally open from one end of the seam to the other with a piece of fabric sewn/basted underneath. Again, yes this is the essence of the seams on my jacket, but the major difference is that only a small portion of the seam is open...so in my book that does not make it a slotted seam.


Please feel free to agree or disagree, 'cause I still think of the seaming detail as faux welt pockets! *smile*

Wednesday, April 09, 2008

More Jacket Construction - Faux Welt Pockets

I bought the Vintage Vogue Pattern from Lanetz Living in a size that I can't wear because I was so intrigued with the faux welt pockets. After getting the pattern home and reading the directions I realized that it was a very easy technique and something that I could appropriate and add to another pattern.

So to get the look I wanted, I took one TNT jacket pattern (OOP Vogue 2285), added a great instruction sheet from a vintage pattern, used several days to sew, had a spirit of adventure and got a wonderfully different jacket.

As the title states, I am going to share with you how I made the faux welt pockets. This is where the sense of adventure, the instruction sheet and a willingness to cut up a TNT pattern comes into play!

1. Pattern Alteration
First, I used the original jacket front piece. I altered this piece several jackets back so that it would have a cardigan type front. To emulate the vintage pattern, it required the high neckline so the original piece was my starting point.


Next, I cut the pattern apart. To get the same seaming detail, I laid the vintage pattern pieces on top of my original jacket piece. Drew a line across the pattern and cut. Then I added a 5/8" seam allowance to both sides of the pattern piece.


The bottom third of the jacket was cut at the pattern waistline which was marked on the original jacket pattern piece. Again I added a 5/8" seam allowance to both cut pieces. (The picture above shows my first attempt at cutting the pattern apart. Because it wasn't working, I then added the vintage pattern to the top and recut the pattern!)

To make the openings, I again used the vintage pattern pieces laid on top of my now cut apart jacket fronts. Using the markings on the vintage piece, I transferred them to my new pattern pieces with a sharpie marker to make dots. Once the dots were on my pieces, I made larger X's so that I would clearly know where to stop and start the seams.

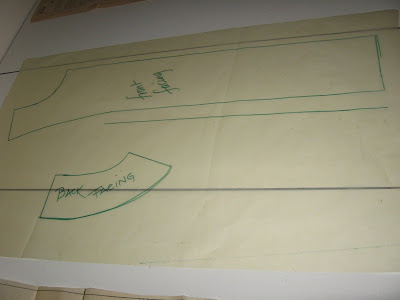
I also drafted new front and back neck facings since my TNT pattern does not include them. I did this by just laying some tracing paper on top of the original uncut pattern and drawing out the facing. I made sure that I measured the same amount on the front facing piece as the back neck facing shoulder seams...so the pieces would fit together easily when sewn. This was done to copy the look of the vintage jacket.


2. Construction
I followed the instructions in the vintage pattern step-by-step.


a. First the darts were sewn in the middle section.

b. Then the top section and the middle section were sewn, right sides together, leaving the sections at the x's open. I reversed stitched to make sure that the opening seam edges were secure. Then pressed the seam open.

c. I followed the same steps listed above to sew the bottom piece to the top piece.

d. Since I wanted my underlays to be the same as my lining and tank top fabric, I used the pattern piece from the vintage pattern. 4 underlays were cut using my Gingher pinking shears.


e. Then on the inside of the front piece, I pinned the right side of the underlay to the wrong side of the jacket, over the opening in the seam. Then the underlay was basted into place. This was repeated on all of the pieces.


f. Next I topstitched the opening edges through all the thicknesses. I used my foot as a guide to get a well stitched pocket. Isn't it kewl how just a little of the lining fabric peeks through the pocket!


And that was it! A little pattern work, a little precision and faux welt pockets! I love this look and want to make another suit from a midweight linen for spring/summer using this same technique. Maybe a black linen with white stitching and a black/white polka dot lining!

I've already done a post showing you the interior workings of the jacket. So my next post will be about the sleeves. And then a picture of me wearing the outfit!

I have to admit that before reading Shannon and Summerset's posts about their love of vintage patterns, I never really paid much attention to them. Once Summerset started to show the instruction sheets and wrote about the detailed construction tips, I became intrigued. I was hooked when I bought my first vintage pattern from Lanetz Living and got my hands on an instruction sheet.

Now I troll the site looking for patterns with interesting construction details. It is not necessary for the pattern to fit me. It is more important to see what new techniques I can learn. And that is what this project and this jacket was all about - learning a new technique! It was a very easy process and gave a tremendous bang for the buck! The jacket also is envogue but different from what everyone else was dialing up at church on Easter Sunday and in my workplace. The pattern and instruction sheet are worth way more than the $3 I paid for it!!! And I encourage everyone to purchase at least one vintage pattern...you may be surprised at what you find inside!

Monday, April 07, 2008

The Jacket is Finally Finished!!!

Yes, it is finally finished to my satisfaction and was worn to work today...

The suit stood out like a beacon in a sea of blackness...yeah, most of the women in my office wore black pantsuits today and there I stood in a seagreen jacket, coordinating seagreen striped tank top and vanilla lined tencil pants. I looked "pretty"...hopefully pretty and professional!!!

I am going to describe the construction of this jacket in a series of posts. Mainly because there was just so much that went into turning my TNT jacket pattern into a version of the Vintage Vogue pattern, that it's too much information for one post. This was one of my most ambitious interpretations but I think the final jacket and tank were worth the effort!

The vanilla skirt still needs to be constructed. As noted above, I wore it as a pantsuit today because I really wanted to wear this spring-like outfit on a dreary and dank day that is suppose to be a spring day but definitely wasn't!

However, today's post is going to be about the buttons and snaps! Might as well start at the end and work towards the beginning since this was the last thing on the jacket. *LOL* Actually, I am starting here because I haven't made a covered snap in over 20 years, so I had to relearn a technique!

Because of the faux welt pockets on the jacket front, I decided not to make buttonholes exactly like the vintage jacket. Originally I was going to add covered buttons from the jacket fabric with covered snaps as closures. Working towards that goal, I found instructions for making the covered snaps in one of my Bishop books, "Fashion Sewing by the Bishop Method."

Of course, the first one I made was very rough. By the third set I had a rhythm down and they were passable enough to put on the jacket. However, I now need to make another jacket where I can use covered snaps so that I can improve this technique.


The instructions for making the covered snaps were really simple:
  • Cut a circle of fabric the size of a small spool of thread

  • I changed this to a slightly larger spool because I was using snaps larger than pictured in the example.

  • Punch a hole into the fabric with a stiletto and place the lining over the base of the snap.

  • Sew a basting stitch around the circle of lining; draw up the thread and fasten neatly on the underside.

  • This took a lot of hand stitches on the first ones but I figured out how to draw the basting stitches tighter on the subsequent snaps.
And a hint or two:

1. Use a straight pin to find the holes on the snaps to stitch through...it was a lot easier than stabbing the needle around looking for them.

2. I also used a double waxed thread in the needle so that I didn't have to stitch through the snaps so many times.

It is a simple technique that with a little practice gives a garment a really upscale finish. I will use this technique again soon!

The final change was regarding my button choice. As I was searching for my covered button forms, I found these amazing gold & flower buttons in my button collection. They gave the jacket a more vintagey flair so I used them instead of the covered buttons. It was like adding jewelry to the jacket and I'm glad that I went with them instead of the covered buttons...plus they hid a lot of the bad hand stitching that was used to stitch the snaps onto the jacket.


It was the last thing added to the jacket but it gave the jacket a wonderful WOW factor!!! More later on the pattern alterations and making the faux welt pockets!

Sunday, April 06, 2008

And the Winner Is...

After carefully checking the comments section, I used this high-tech manner in which to pull the winners names:

My DD#2 gladly volunteered to pull the names...and the winners are:


Emily for January 2008 and
Valerie for March 2008


Congratulations to the winners! Please send me an email at cnorman underscore 98 at yahoo dot com with your mailing addresses and I will get the issues out to you right away!

On a different note, I finished up the Easter Suit 2008 Jacket and will have details and pics either later today or tomorrow! Hope you had a wonderful weekend!

Saturday, April 05, 2008

12 on a Desert Island

Yesterday Lisa of Sew Random wrote this really kewl and fun post with these specifics:
  • "You have to move for one year to a very small space that does not have access to retail or internet pattern sources. You have only room to take 12 TNT patterns with you. So, what patterns would you take to meet any wardrobe needs in the next year?"
Okay this is right up my alley! I use TNT's all the time. Most of my wardrobe is just a series of TNT patterns rearranged and made over and over again. So I happily sat down last night to write out my list and to my surprise I only have 10 TNTs that I would take with me! Egads! You mean I have so little sewing imagination that I use the same 10 patterns repeatedly! Excuse me but that is truly a heavy revy!!!!

So here are the TEN patterns I would take with me!


This is a workhorse in my wardrobe. I have been making this little tank top for the last 4 or 5 years and have made it out of every fabrication possible, linen, silk, wool w/lycra blend, cotton. It works so well with my corporate wardrobe and makes up quickly now that I've gotten the pattern fitted. A couple of weeks ago, I even made it out of a knit and added a bowtie to it...yeah, this one is definitely coming with me!


I have worked with this pattern in several sizes and have transferred it to pattern paper after pattern paper when I've worn it out. I have altered my pattern from a smaller size to a larger size. I have sliced and diced it and used it so many times that I don't even remember which pattern it originally came from! I have made it in every fabric there is...so yes this would be in the shoebox of patterns that I would take with me.

Take every sentence I wrote above and change the word skirt to the word pants! I even have this pattern in several pant leg widths. So this one would go too.

I actually know where this pattern originated from - Butterick 5932. However, my pattern looks nothing like the original! A have imagined this dress into everything...a Chanel knock-off, a jumper, a dress with a pleat down the front and who knows what the future holds for it! Definitely coming along!

This pattern has only recently been added to my TNT list. It is a notch collar jacket that makes up easily and has seen three renditions in my wardrobe...well one is in the post production stages...but if I needed a great little jacket for any event, this would be the one!

This skirt pattern started life as a one piece, floor length, bias cut skirt which I made at least 10 versions of before I cut it apart. After it was cut apart, I shortened it, changed the grain line not once but twice and generally ended up with a pattern that works for all occasions. It was an important piece in my Jackie Kennedy knock-off suit as well as used for my DD's Easter skirt. Definitely sticking this one in the shoebox!


When Simplicity issued this pattern and then Sew Stylish dedicated a magazine issue to its usage, I was intrigued and in awe...an entire issue about taking a pattern and making it your own! You know I had to make some garments from it! After much wrestling and pattern alterations, I have managed to make it a TNT pattern. This pattern offers so much and I haven't begun to explore all the variations yet, so this one would most assuredly make the trip!

I love twinsets and I suffered through the fitting and sewing of several big 4 patterns before I stumbled onto this one. I loved it so much that I bought two copies of it so that I would never have to worry about having it. This has been lengthened to dress length and fingertip length. I have shortened it and made from thin, thick, ribbed and rayon knits. It is a workhorse and a vital part of my wardrobe...into the shoebox it goes!

Its funny that shirt dresses are so hot this spring because this classic style has been in my TNT collection for at least 5 or 6 years. The first time I made it from a lt periwinkle blue linen, I knew I had a winner. It has subtle waist shaping, and an easy to apply collar and collar stand. The original pattern came with short sleeves but my best rendition of the pattern has long sleeves. Its been made in several fabrications and my next version will be an embroidered eyelet sleeveless version for spring. This pattern is seasonless and a classic. It would definitely go with me!


10. Vogue 2285 Jacket
Another hard-working jacket that has been altered from the original pattern! I have used it in several skirt suit outfits, it was the basis for my Easter suit jacket and it's original inception was as an eyelet jacket for spring. This pattern is another great jumping off point...I can use it and end up anywhere!

So Lisa has asked others, "What would they take?" And now I'm asking? What TNT patterns would you take, if you could only take 12? Also, do you use TNT patterns or are you a one-time only user? Think about it and let us (me and Lisa) know!!!


***Special Note***

I am pulling the names for the free Threads magazines tomorrow instead of today! So if you thought it was too late to enter the free giveaway its not! Leave a note tonight 'cause I'm definitely pulling the winner(s) tomorrow!!!!

Til tomorrow!!!

Thursday, April 03, 2008

Most Excellent Blogs

I know that title sounds like I think none of the other blogs out there are excellent but hey I was suppose to name only 10! Please know that I read wayyyyyy more than 10 and enjoy them all for various reasons!

However, these listed below were chosen (and several have been chosen by quite a few others!) because they exemplify my definition of excellent. So what do I think makes an excellent blog?

1. It is well written
2. It has good pictures
3. I learn something from it constantly
4. It inspires me
5. The author posts frequently
6. The author has a passion for sewing - mucho important!!
7. The author has a voice - has something unique to say
8. The author points me to other interesting sewing spots on the web
9. I can "see" something of the author's personality in the blog
10. The totality of the blog makes me want to be a better sewist.

So, onto my top ten...I am listing them alphabetically because in my mind none is greater than the other...they all have the same qualities that cause me to visit them daily searching (haunting/stalking) for new posts.

Couture et Tricot
'Fess up...you know we all oooohhhh and aaaahhhh over what Tany sews! She makes these amazing garments and takes you step by step through the construction process. Tany makes you want to improve and grow and sew like her! Besides, Tany is one of the nicest people...always a kind and encouraging word to say. I aspire to this level of sewing and it's good to know that there is someone out there showing me how to get there!

Danvillegirl Sewing Diary
I love Linda's blog because its me sewing! She trys new techniques. She shops for fabric. She LOVES shoes! And she is always growing, bringing her sewing to the next level. She fits all of this into a very busy lifestyle but she always makes time for her passion - SEWING. But mostly Linda sews the same type of clothing that I sew so it is inspiring to watch her on her journey especially since at many times it mirrors mine.

Hungry Zombie Couture
Shannon is my fabric twin separated at birth! *LOL* Except for Marji, I think no one loves the acquisition of fabric as much as Shannon and I do! And we like a lot of the same pieces...it is amazing how alike our collections are. But I want to be like Shannon when I grow up because she sews A-L-O-T!!! Anyone who can year after year make over 100 garments is someone I want to be like. She challenges me to believe that I will someday be able to do the same thing! Oh and she also LOVES shoes!

Laura's Sewing Room
Laura has such a thirst for knowledge coupled with some amazing skills that I'm always awestruck by what comes out of her sewing room. She thinks out of the box with her sewing. Nothing is predictable. She collects tutorials and uses every bit of the information in her garments - prompting me to challenge myself. And here's the great part, she actually thinks I can sew too! *LOL*

Miss Celie's Pants
I have to tell you the first time I went to Cidell's site it was because I was intrigued by the title of her blog...'cause I knew that it referred to Celie in the Color Purple. And I can tell you just about every movie that has someone sewing in it...that's why I went. Why did I keep coming back? Because Cidell has such a passion for sewing. I like the childlike wonder that sewing gives her and which she so gladly shares with all of us. There is a purity and honesty to it that draws you in and makes you want to sew along with her. Cidell is just one of the girls and you want to be her friend, drive down to Baltimore and spend some quality time sewing with her! She has become a true friend all because we both love the sound of a sewing machine humming along! *smile*

Pins & Needles
Wow! I didn't know that people like Summerset existed before the internet! No, seriously! Her work is impeccable, well-thought out and prize winning! I always wondered what the women were like that created those jaw dropping outfits and Summerset more than exceeds anything I could have imagined! She is generous with her sewing knowledge. She causes me to think. She inspires me to move beyond my comfort zone. And she posts every single day except Sundays! Having a bad day at work and I don't want to fabric shop...wait to 3ish and Summerset will have a post up! Something that can tide me over and roll the dark clouds of heaviness (from work) away! I have learned so many things from her and have acquired a love of vintage patterns because she shares her passion so vividly with the online sewing community.

Sew Intriguing
I first "met" Liana on the now defunct Sewing World. She and Kathryn encouraged me when I felt overwhelmed and discouraged by meeting some amazing sewists on the internet. I think we all think we can sew mostly because we have done it in solitude. When I joined the online sewing community I quickly learned that there were some really skilled women out there - Liana being primary amongst them! Yet she welcomed me with open arms like I had skills like hers - NOT! *LOL* And she is always doing something new and innovative - saran wraps, Marfy Patterns, sewing from a block - just to name a few.

However, I have a blog because of Liana. She started blogging way before blogs were a dime a dozen and she opened my eyes to the fact that you could have your sewing say without limiting the words you had to say on an online message board. So the next time you're smiling or nodding your head to something I've written, say a silent thank you to Liana because she is the Godmother of my blog!

Sigrid's Sewing
I have only met one other person who can sew lingerie like Sigrid! I am so intrigued by the fact that on any given day, everything she is wearing from her "knickers" to her dress could be made by her own hand! And she doesn't just make any ole basic bra and panties set... no they match, have amazing lace and generally look better than anything Vicky sells! She also has written some awesome tutorials on the subject that can be found on the sidebar of her blog. She has inspired me to want to try and make some lingerie of my own. Now if I could just find enough time in the day!!!

Stitches and Seams
Debbie is a fit maven. I have been silently stalking Debbie's movements since I joined Pattern Review...y'all didn't know that did you! One of the main reasons is because Debbie is one of the few plus size women blogging and explaining how to get a good fit for the plus size body! People that is huge - no pun intended! Plus size women have a whole different set of fitting issues as well as emotional issues due to our weight so it is especially encouraging to see a plus size woman working it. The difference between Debbie and me is that Debbie has a more casual lifestyle than I do so she shows a different type of garment that I do. Also, Debbie can teach! She can break it down in plain english so that you understand perfectly what she is saying. In my book she definitely takes you on a sewing journey every day!

That's Sew Live
Lovely (Tearsa) makes my Top Ten simply because her blog oozes passion. She is a beginner whose love and joy of sewing emanates from the pages of her blog! Watching her take her baby steps, infuses me with joy! It makes me appreciate my gift of sewing. Even her love of a good pattern sale is infectious! I can't wait to watch her grow into her passion...she is going to be amazing!

I know y'all are wondering why my girl Marji is not on the list! Well Marji is in a special class of her own and since she now knows so many of my secrets, I can't honestly rate her! Y'all know she can sew as well as knit. She is an amazing teacher but her role in my life is of encourager. She encourages me to buy fabric. She encourages me to stretch my sewing muscles. She encourages me when I think I can't sew at all! *LOL* Yeah, I have those days too! I talk to Marji at least two or three times a week - about everything! But mostly Marji has the most amazing fitting skills...don't know how to fit something, ask Marji! She can diagnose anyone's problem regardless of your shape and size and she will give you just the right solution to make it work! Right Cidell!

This last year God has been so good to me because I have made friends with some amazing women who love to sew as much as I do or more! I know that almost everyone I listed has been nominated by someone else but I wanted to do a special post to show my appreciation to them for inspiring, challenging, encouraging and sharing my love of sewing.

Again, thank you all for providing a much needed balance to my life...for inspiring me...for sharing my love and my passion but mostly for inspiring others too!

Wednesday, April 02, 2008

Major Goof!

Okay, I am an inconsiderate, totally unreliable goof! In my comments section today, I received a note from Julie #2 simply stating, "I thought I sent you those trims!" Because I had attributed that wonderful gift that I blogged about yesterday to Terri...please tell me that your boss' name is Terri?!! Please! Cause otherwise I have lost my d*mn mind!

Anyway, I wanted to publicly acknowledge that I made a big boo-boo and tell Julie #2 thank you so very much for thinking of me, for sending the trims and for letting me off the hook! Pleeze!

*hanging head in shame*
Carolyn

Tuesday, April 01, 2008

Mailbag!

Some interesting things have come in the mail lately - and no NOT fabric! *LOL*

First, after my last post on embellishing, Julie #2 and her boss sent me the following trims! I already have an idea for one of them, which you will see soon!


Then the long awaited pattern and muslin from Debbie Cook arrived! Debbie made this BWOF blouse, reviewed it here on Pattern Review and as she started to work on it, I begged for a copy of the pattern once it was finished. Well actually I started begging when she said she was going to make the blouse and I really wanted one like this! And I didn't want to have to grade up the pattern!!!! Debbie being the generous sewist that she is, sent me not only the pattern but the instructions, her last muslin and a swatch of her fabric! Tres kewl! So I can alter her muslin and the pattern to get my own perfect fit! I am in sewing heaven!!!!


And three new Vogue patterns...I have bought more patterns in the last 4 months (well since joining Club BMV) than I did all of last year! The convenience of picking patterns well in advance of a sale, keeping them in the shopping cart on the site until the next sale, always having my size available and then having them delivered to my mailbox is one of the best $13 investments I've made in a long time!


So in the spirit of "Pay It Forward" I have two new Threads issues that I want to give away. See what happened was...I recently renewed my Threads subscription about 2 years after letting the old one lapse. The newsstand is on my way to work and it is so convenient to pick one up there...however, lately the Threads shows up there about a month after everyone has received it at home! And the conversations surrounding the magazine were wearing me out with anticipation, so to eliminate just one more unnecessary stress in my life - I reupped.


What does this have to do with paying it forward...I am giving the issues away along with free postage to anywhere in the world! The issues are the January 2008 issue with the one easy casual skirt on the front and the March 2008 issue with the little black couture dress on the cover. If you want one or both, just leave a message in the comments section and I will do a random drawing on Saturday...that should give those interested enough time to say something! I will reveal the winners then!

Finally, my friend Summerset (yeah, girl, I think of you as a friend even though I've never met you face to face!) has awarded me the "Excellent Blog" Award!


Thank you so much! It means so much receiving this recognition from such a talented sewist! But I have to admit that I am even more excited that you nominated my girl, Marji, who is a phenomenal yet unsung sewing talent in the online sewing community! I want to do a separate post on my nominations, so look for that tomorrow! Until then...

Monday, March 31, 2008

Transitional Sewing

Yes, this transitional sewing plan happens twice a year...between summer and fall and between winter and spring. Since it's the time of year between winter and spring, and even though I am already thinking about wonderfully colored summer dresses in light and airy fabrics...the reality is that it is going to take a minute to get that warm here in the Northeast.

So every year I add several pantsuits to my list for both transitional periods...every year I get maybe one made. Which I then precede to wear into the dirt so that I end up right back where I started. And this year is no exception, 'cause there are two pantsuits on my transitional sewing list!


eta: In the interest of full disclosure - I made this suit last year! But it is the type of suit that I will be making for my transitional wardrobe. Don't want anyone thinking that this is something new! :)

Now I'm sure you are wondering why even make up a transitional sewing list? Well because I LIKE new clothes and you need something, you really do, for those slightly chilly yet beginning to get warmer days...and I am TIRED of my winter clothes! Aren't you?

So without further ado, here is my sewing list:

1. Make vanilla silk twill lined straight skirt to coordinate with Easter Suit jacket.

2. Chocolate brown/pink pinstripe pantsuit (already cut out from last fall - just waiting to be stitched). Make SW Mission Tank from pink silk crepe.

3. Pink cotton twinset - using Burda OOP cardigan & SW Mission Tank with tie.

4. Black ltwt gabardine pinstripe pantsuit - using V7944 and made exactly like the brown suit in the photo.

5. Brown cotton eyelet from Gorgeous Things in Tamotsu dress sleeveless with white piping. Make a white cotton shrug type sweater to wear with...

And that's my transitional list - short, sweet and hopefully doable. I am learning not to pile the entire world on it! *LOL* In the hopes of actually finishing all of the garments on the list.

So what about you? Are you sewing things for a transitional period or are you going full steam ahead into spring/summer? Or do you even have a transitional period? And for my friends on the other side of the world - how does this work for you? Do you transition or do you slide into a season full-tilt?

Now that the weekend from home dec hell is over - which btw I did not sew a thing! I gave in and purchased a lot of stuff!!! And even that made me feel like I was going to break out in hives! I will be working on my list and getting some things made!

Sunday, March 30, 2008

I Abhor Home Dec

eta: from Marji - seems I used the wrong word...but I am standing by the content cause I ABHOR home dec...*LOL*

loath - adjective
1. unwillingness to do something contrary to your custom; "a reluctant smile"; "loath to admit a mistake"
2. (usually followed by 'to') strongly opposed; "antipathetic to new ideas"; "averse to taking risks"; "loath to go on such short notice"; "clearly indisposed to grant their request" [syn:
antipathetic]

loathe - verb
find repugnant; "I loathe that man"; "She abhors cats" [syn:
abhor]


Well I guess you can tell that spring is approaching...

Because spring usually makes me want to clean closets or fix something...but due to a downstairs neighbor, I had to fix a lot of something in my apartment...which in turn caused me to just go ahead and change curtains, bedspreads etc.

Now I A-B-H-O-R home dec sewing...give me a pattern with a lot of little pieces, a great piece of fabric and a vision and I am happy as a pig in slop! Give me long pieces of fabric that just need straight seams and I'm running as fast as my little feet can carry me away from the scene.

However, since these actions have been FORCED upon me, I am the midst of home dec hell! So there will be no garment sewing this weekend...

Which brings me to just one other point before I go to move some furniture...I HATE LOEWS! Yeap that's right the home dec/do-it-yourself store...poor customer service, more poor customer service and even more poor customer service makes me wonder how they stay in business!

I am still planning my transitional wardrobe but alas home and hearth has taken precedence this weekend. I will have more garment related sewing soon!

Enjoy the rest of your weekend!

Thursday, March 27, 2008

Why do we sewists point out the flaws?

I have been asked that question or some variation of that question either here or in personal emails and I have even been scolded by a very good friend about pointing out flaws in my garments!

I have one word for this question...perspective...and then quite a few more words! *LOL*

See several of you read my post as the garments are flawed ~ where I saw the garments as unfinished or incomplete. I chose the route of full disclosure because I realize that pictures can and do make the garments appear finished and perfect. Personally, I don't want to perpetrate that fraud so I listed what wasn't finished with each piece or what I will change to the piece...that's Point 1.

Here's Point 2, I think of myself as an enthusiastic sewist who has a passion for sewing, fabric and clothes. In no way do I proclaim to be or want to portray myself as an authority on fit or as a great instructor who knows how to sew each and every piece correctly. There are so many blogs out there authored by some fabulous teachers and sewists who tackle these subjects so much better than I ever could...Don't make me name, names! *LOL*

I write about my sewing adventures to encourage other sewists who are just beginning their sewing journeys, or who are returning to sewing after some time away or even for sewists who sew at the same level that I do. And please understand that I realize that I'm in the middle of the pack when it comes to sewing talent. I am so impressed and inspired by some of the really talented sewing artistes who are blogging. These artistes not only have amazing technical skill, technique and knowledge, they share it so willingly with the online sewing community!

Point 3 - my "Make it Work" post was suppose to be the first post and then I was going to write a follow-up post detailing the changes to the finished garments. I still intend to do this, its just a little hard to do if I haven't had the opportunity to make the changes yet. So let me state here emphatically, that I don't believe my garments were flawed, they were unfinished, incomplete, rushed BUT NOT flawed!

Finally, please understand that I am not looking for affirmation. I know who I am, what I'm capable of doing and what I still have to learn. I am quite pleased with me right here in this place, knowing that there are more sewing journeys to take and learn from. However, if I can inspire just one person to fall in love with sewing as a newbie or again, or one plus size woman can realize that you CAN have a fashionable and fabulous wardrobe no matter your size, or even that being "middle-aged" doesn't mean you have to be marginalized...then hey, I am doing a good thing!

And for the wordsmiths amongst us...dictionary.com defines "flaw" as:
1. An imperfection, often concealed, that impairs soundness,
2. To make or become defective
3. characterized by flaws; having imperfections

Now talk amongst yourselves, 'cause I have a transitional wardrobe to plan and sew! Til next time!

Tuesday, March 25, 2008

My wardrobe and sewing

Pajntsl asked:
If you had to give a %, how much of your closet consist of things you made, opposed to RTW? And whats TNT?

Let's start with TNT - means Tried and True Pattern. You know a pattern that you've made over and over and you've worked out all of the fitting issues, so you can just lay it down on the fabric, cut it out and sew it up.


Now to the main question - I would say that I make 90% of what I wear. Yeah, I know that's scary right! *LOL* For me to purchase RTW it has to meet several criteria - one, it has to be under $20 for the garment ~ anything over that I can reproduce at home! Or it has to be something that is a waste of my time to reproduce, i.e., the cotton tank tops that I own in every color! I also tend to purchase sweaters because even though I can make fantastic twinsets sometimes it is just easier to buy them. And I still haven't perfected a turtleneck pattern yet...when I do...watch out! So all of my turtlenecks are RTW!

I see y'all shaking your heads in disbelief, but think about it. If I produce approximately 50 pieces a year, it wouldn't take long before most of my wardrobe is made by me. Since I've gotten a pants pattern to fit, I haven't bought a pair of RTW pants. I can't remember the last dress, skirt or suit jacket that I've purchased. I broke down recently and bought a jean jacket only because spring goes by so quickly that I never get one made in time...not that I don't own several jean jacket patterns and quite a bit of denim! *LOL*

Probably the follow-up question is how and why?
Sewing is my passion. I would much rather spend time doing this than a lot of other things. Also, I have raised my children. I no longer have to cart kiddies here and there, go to PTA meetings, birthday parties, afterschool activities, etc. that use to consume so much of my days. I am also not as involved in church as I was when my daughters' were younger. This leaves alot of time on the weekend for sewing.

But mostly, I guess the answer is that I can...so I do! So what about you? Do you sew most of your wardrobe or do you have a combination of RTW and Couture Sewn...I refuse to call it home made! And what is the percentage if you do? Now for the $100,000 question, if most of your clothing is RTW, yet you love to sew, why isn't more of your wardrobe sewn by you? What prevents you from sewing more? Is it fitting the pattern? Your skill level? What? I really want to know so talk back to me!

Sunday, March 23, 2008

"Make It Work!" Sunday

Happy Easter Everyone!

Yes, I did wear the suit to church today. I finished it enough to "make it work" and wearable, but it wasn't finished with all the detailing that I wanted. In my opinion, the jacket needs another 3-4 hours of effort before it is "perfect"!

I decided to go with the top and skirt instead of the dress after making my daughter's skirt ~ thinking that it would be quicker and I would end up with more versatile pieces...I think I sewed them so quickly that I am not happy with the final outcome. There is still some more work to be done to all of the pieces to bring them up to the level I desire.

I guess I should have cried "uncle" but I R-E-A-L-L-Y wanted to wear the suit today! *LOL* Okay, so let's start with a picture...then I will tell you everything that isn't finished or went wrong and what I'm going to do about it!


First the jacket:
1. Needs covered buttons and covered snaps added to the jacket fronts so that the jacket will close. I decided to leave these off about 10:00 pm last night.

2. Needs sleeve linings. Those sleeves only have organza in them but no sleeve linings. I jettisoned that part about 1:00 am this morning. So I will remove the hand stitching at the hem and add the sleeves by machine stitching them to the hem and then hand stitching into the jacket lining. Since I never took my jacket off, no one noticed.

The top:
I originally had a bowtie on the top. Yes, took all the time necessary to cut, stitch and add a bow-tie to the Sewing Workshop Mission Tank. The idea worked but the top looked horrible with the jacket. So then I had to remove the bowtie, however, the neckline was a little wonky due to way I cut it to add the tie. I wore it with the wonky neckline today but I will have to fix it. I think I'm going to add some pleats to the top front and a bias binding to the neckline so that it will stop slipping off my shoulders and down into the jacket sleeves.

The skirt:
It will never be worn with this jacket again. I wanted a sleeker look but started to panic at 8:30 pm last night when I realized that I hadn't started a bottom piece yet. I quickly constructed a TNT 4-gore skirt and wore it this morning. However, I don't really like this combo so I will NEVER wear the two pieces together again. I have a vanilla medium weight silk twill that will make a wonderful straight skirt for this outfit. I will use that, take my time and make a well-fitted, lined straight skirt that will add some ooommph to this outfit.

All in all I met my goal but if I was graded on my sewing techniques I would probably get a C+. On Project Runway I would not be eliminated but I wouldn't have won the challenge either. Though I don't think Jesus cared much...I mean I was clean, clothed and attended service with a pure heart so I guess that's what mattered most! *LOL*

Once the corrections are made to the pieces, I will give a full review of the process because I did do some interesting things during construction. And the jacket does have some great details that I would like to share.

On the PR reviews, one of the final questions is, "Would you make this garment again?" And my answer is I honestly don't know! I think the deadline definitely affected so much of the process, and the best thing I re-learned from this...Don't sew on a deadline because you just don't do your best work! *LOL*

Finally, one shot of the family ~ my daughters, my sister & my niece and nephew:


I hope you had a wonderful day with your family too!

Saturday, March 22, 2008

A Commercial Break

One of the other things that I had to accomplish this weekend was a simple 4-gore skirt for my youngest DD. She doesn't ask me to sew for her often and since this was an easy request I said yes!

I am using this fabric purchased from Metro Textiles last spring:


And I am making a version of this skirt:


This is my TNT skirt pattern that has been altered several times and is a workhorse pattern and garment in my own wardrobe. Every time I produce another one of these skirts, she admires it so this was my starting point.

And here is the final skirt:


It was a down and dirty sew because I still have soooooo much left to do on my Easter Suit that I am already thinking of alternative things to wear with the jacket! But that is stuff for another post!

Skirt stats:

3 yards of a mesh print from Textile Studios
3 yards of black rayon lining
TNT pattern altered to fit my daughter
1.5 yards of lingerie elastic


I used a serge hem finish on the bottom of the fashion fabric and straight stitched the lining fabric.

Well that's done now back to the Easter Suit!

LinkWithin

Related Posts with Thumbnails