Saturday, March 09, 2013

Fabric, New Friends and more Fabric

It's been a long week...

So last Sunday I cut out the dress and the coat from the wool tweed and realized that I was a yard short of the wool tweed...not enough to make the sleeves. Then I got anxious about how much lace I had and decided more was better than less...

Monday after work I headed back to Mood to pick up additional fabric and the peach silk charmeuse for the lining...

Guipure lace, peach silk charmeuse, peach wool tweed (left to right)

That was the first fabric run.  Then fabric showed up in the mail during the week...yeah I know I have a problem but I think I started the post with it's been a long week and fabric makes me feel better. It's way better than a couple of drinks, at least in my world.

poly/lycra panel print knits

ponte herringbone 

The weather started to turn midweek.  I hate rainy days because it makes commuting a total pain in the arse!  But I hate snow even more...well Thursday it did both it rained and snowed but I still ventured out to meet the MSN bloggers after work for dinner in NYC...

Peter and Meg (Instagram Pics)

Lladybird, Oona and Ginger (more Instagram photos)

It was great getting to meet Lauren (Lladybird), Sonja (Gingermakes) and Peter (Male Pattern Boldness) for the first time!  Dinner was fun and all about sewing because what else would we talk about?

Then Friday morning I woke up to this...

6am from my bedroom window

6:40am on my way to the street to the bus stop

Yeah...snow...and not enough snow to stay home...just enough to make commuting annoying!  But not so annoying that I didn't leave work a little early (just as the snow was stopping) to meet up with the Mood bloggers at Mood...and this followed me home...

Silk printed panels, ivory Marc Jacobs boucle, lime wool crepe
and printed ponte knit

I really need to stay off the third floor at Mood because I always find the best pieces there...and not the cheapest ones but the most amazing pieces that always beg to be brought home with me.  I really tried hard to convince Lauren that she needed some of this piece too...especially since it was backed with a lightweight fusible interfacing.  


You know how much I love owning these pieces of fabric and how well they sew up!  I originally bought it thinking a dress but now that it's home, I know it will make a great spring jacket...so we shall see!

Lauren and I also spent some quality time in the wool crepe aisle bonding over a fabric type that we both adore!  I had a great time with the ladies and gentleman both at dinner Thursday night and again on Friday afternoon at Mood.  It was a wonderful way to throw off the concerns of a very long week.  

Now that I've got all the materials I need for the outfit home in the sewing cave, I will work on the dress this weekend.  However, if you're in NYC today and see a bunch of people roaming around Mood, it's other sewists joining up with Lauren and Sonja to fabric shop.  Sure hope you all have a wonderful time!

Me...I gotta get this dress and jacket done!

...as always more later!


Sunday, March 03, 2013

MSN Lace Challenge - Part One

For the month of March the initial nine bloggers at MSN have been challenged to use lace, any type, for their garment. I've been pondering, thinking and worrying about what garment to make and how to use lace.

My first idea was to copy a Dolce & Gabbana dress that I found online...


But the desire to interpret that garment faded when I found this Oscar de la Renta dress at Neiman Marcus...


Close up of lace dress

The silhouette is similar to the D&G dress but the lace that Oscar used is what caught my eye.  See I've made several lace pieces before...


However, I've never made one using Guipure Lace.  One reason being the price ~ because it ain't cheap!  The second was because I'd only thought of Guipure Lace used in formal dresses and wedding gowns.  Even though the outfit that I'm planning is a little on the dressy side, there has been so much lace of all types showing up in designer and regular RTW lately, that I decided to go for it.

Here are the fabrics that I'm using for my interpretation minus the peach silk charmeuse (for the lining) that I still have to purchase...


Wool Tweed & Guipure Lace in Peach

This will be my Easter Dress.  The good thing about it is that it won't be too dressy to wear to church where you can rarely be overdressed.  Okay a ball gown might be a little over the top there but otherwise dressy works.

I will start with my TNT dress as the basis.  However, after taking Susan Khajie's lace class at Mood NYC there will be a lot more handwork in this dress than in the two pictured above.  That's just one of the techniques that I learned during that class that I will incorporate into the making of this dress/outfit.

A coat may also make an appearance...not sure if it will be a part of the Mood garment or added later on.  It depends upon how much time I have but since Easter is the last Sunday in March, I'm sure it will be a little chilly.  I'm starting on the dress today, cutting out the wool tweed.  The plan is to use the back seaming of the CK Dress and my regular dress front with side darts.  Next up will be more construction info...

...as always more later!


Saturday, March 02, 2013

Print Blocking A Cardigan

Last weekend was a calm sewing weekend.  There was no list, no agenda just me and all of my fabric, patterns and sewing junk keeping me company.  I knew I wanted to repair and remake the black wool crepe pants because I needed them. What I didn't realize is that I would end up working on a cardigan, too.  I started with this fabric...


...but realized that I didn't want an entire cardigan made from the black/white/gray argyle print.  I thought it would be a little overwhelming.  I remembered that I had about a yard of a lighterweight black ponte left in the collection (see that's why I don't like to throw larger scraps out!) so I combined the two for the cardigan. Argyle fronts and sleeves with black ponte binding on the front, for the sleeve hems and for a solid back.


Since I've made this cardigan several hundred times (well not really!) there were no new construction details.  However, I did cut the sleeves about two inches shorter to accommodate the black ponte that I added to the sleeve hems.  Again this was primarily constructed on my serger (have I mentioned lately how much I love my serger and that it no longer scares me! *LOL*) and this time I added no fusible interfacing to the front bands. Just didn't feel like it, there was no real construction reason not to add it.

I live in cardigans and am always looking for a new one to add to the collection...and that's me made as well as RTW.  It's probably one of the few RTW garments that I still purchase. 

So a few more pictures...

Argyle fronts with black ponte bands...


Argyle sleeves with black ponte bands...


...and a solid black ponte back...


The buttons...


Finally a side view...


This will work with all of the black pieces in my wardrobe but will especially provide a fresh take on the reinvigorated pairs of black wool crepe pants. It was a great basic to add to the wardrobe. 

...as always more later!


Friday, March 01, 2013

Really I've Sworn off eBay

Truly I have!  I had to work hard to remember my sign in because it's been that long since I was on the site.  I can find way too much junk to be sent to my house from there.  Lately since I've seen a couple episodes of Hoarders, I'm rethinking how much stuff my home can actually hold!  Egads that show gives me the skivvies...besides the fact that it annoys the hell out of my that they are exploiting people who obviously have mental challenges...but I digress.

So how did I end up on eBay?  I went looking for an out of print Calvin Klein Vogue Pattern.  Now why did I do that?  Because you know I never found the dayum pattern...instead I found 10 patterns!  *sigh* Yeah I know but they were ten of those working women patterns that Vogue did so well in the 90s.  My mind started whirling and before you know it, I'd hit "buy it now"


Well they arrived yesterday and I'm actually kinda thrilled.  I want to sew four of them right away...and I can make them up in spring/summer fabrics which is even better!  I did escape with only those ten so I count myself lucky! *LOL*  Now I've gotta forget that log-in again 'cause I don't want to end up on a future episode of Hoarders...

...as always more later!

Thursday, February 28, 2013

59 Days into Twenty Thirteen

...and I've sewn an additional four pieces bringing my total so far to 10 newly made pieces...along with remaking two pair of black pants...so I guess that's really 12 pieces since I practically made those pants from scratch.

Two dresses, a skirt and a pair of pants...all good wardrobe builders.  Not a bad total for the month but honestly since I had a five day holiday this past month, I'm disappointed by my output.  Okay, okay I know I'm obsessed but at this point in my life, I can be obsessed.  My children are grown so I have the time to wallow in my hobby...

Anyway, let's recap ~

The Butterick 5679 Print Blocked Dress


The CK Dress


A pair of grey wool crepe lined pants


An Emerald Green Pleather Skirt


...another thing that happened is this...


The Mood Sewing Network got a shout-out in
the April/May 2013 issue of Threads*


The month was only 28 days long and it was jam packed.  Since I'm working on my Easter Dress which is also my Mood project for March...and it's kinda involved...be prepared to be bored during the next couple of weeks as I go on and on and on about making it! *smile*

...as always more later!


*Also check out my girl Cennetta and the mention of the Haute Couture's 50th Anniversary in the same section of Threads!


Tuesday, February 26, 2013

An Emerald Leather Skirt for a Trip to Oz

Faux leather is off the beaten path in Mood.  It's on the third floor, way in the back, behind all of the scrumptious designer boucles.  The Saturday that I was in Mood NYC, I was back there all alone!  But the treasures people, the treasures that are in that section are mind-blowing ~ well at least to a fabric junkie like me!  As I was pulling out bolt after bolt, I stumbled upon this goodness...


...and I knew right away what it should be!  It was love at first sight, really it was! So Todd helped me get it to the cutting table where a conversation ensued about what the fabric should be called.  Now this was a most interesting conversation that involved Shaft & Superfly, whether the fabric was a vinyl, a leatherette, pleather or a faux leather.  Somehow we even managed to get the 70s drug dealers in there, yeah I think that's how Shaft & Superfly showed up!


I've used this pattern before and it's a pretty easy sew but I did add a degree of difficulty by making it up in the pleather.  It's Simplicity 5914 and one of my favorite skirt patterns.  At one point I thought about studding the seams but that was just a little tooooo edgy for my day job. Since I primarily sew for my day job, I really want to be able to wear this to work.  So I scaled it back but I really like this!

A few tips for sewing with pleather ~
  • Only pin the fabric in the side seams because the pins will leave marks in the fabric...and I used them sparingly so that I wouldn't have any issues.
  • You don't need to finish the seams because the pleather won't fray.
  • Use the proper needle for this project.  I started with a fresh size 90 stretch Schmetz needle
  • Use the correct sewing foot.  You can use a teflon foot to insure that both pieces of fabric move together and don't drag.  However, in this instance because the fabric was felt backed I used a regular zig zag foot.
  • When pressing the pleather, use a good pressing cloth, a lower setting on your iron and a clapper to make sure the seams lay flat.  
  • I also finger pressed the seams open prior to pressing.  It made getting the curves open and to lay flat easier.
  • Only press on the wrong side of the fabric
  • Also, Sandra Betzina does a great segment on sewing with Faux Leather in her book, More Fabric Savvy.  Of course I checked it after I had already started to work with my fabric!
This skirt is my on trend dream.  Pleather and emerald green are both hot for fall.  I've managed to incorporate both in one garment.  If you're interested in using some pleather, it's really fun to use for a garment or to incorporate as embellishments, you can find a great selection on Mood online here.


Some stats ~
Fabric and pattern listed above.

Notions ~
Rayon lining from the collection
9" invisible green zipper

Construction Details ~
I lined the skirt in a heavier rayon lining that I had in my collection because if I left the skirt unlined the felt backing would have caught on my stockings.  Also adding the lining gave the skirt a little heft something else I wanted.  

There isn't a hem on the skirt.  Since the fabric won't fray, I just left the hemline with a clean cut finish.  

Adding an invisible zipper was easier than I thought and gave the seam a clean finish which was nice on the pleather skirt.


I'm wearing it kinda conservatively ~ well as conservatively as you can wear a pleather skirt!  It's for Fashion Fridays at work ~ when the staff dresses down a little and I dress a little fashion forward.  It's an interesting on trend addition to my wardrobe.


This is how I will wear it out with friends...


...or with a cardigan and a tank top...


Final thoughts ~
I don't sew many casual garments but this pleather skirt will probably see more time out and about for social events than at work.  It was a fun sew and something different from what I normally make. I really like how the skirt drapes in the back. It also has a closer fit than my skirts usually do because this pleather doesn't grow and it wrinkles like heck...

Now how does this fit into my basics declaration, well it doesn't...but it wasn't meant to.  This is my Mood Project for February. One of my personal goals for my monthly Mood garment is to use fabrics that I wouldn't normally use. Also, to step outside my comfort zone to sew a challenging garment because I don't want to do the same old, same old.  This opportunity allows me to challenge myself, to use fabrics from all sections of the store and to add to my creative journey.  This skirt is the exception to my basics rule but it is kinda funky and fun, isn't it?

...as always more later!


Sunday, February 24, 2013

Remaking A Pair of Pants

Let's recap ~

Last winter was mild.  So maybe I wore pants two or three times.  Because as we all know, I prefer wearing a dress.  This winter, not so mild.  So I had to go into my pants collection, which I hadn't looked at for two seasons.  I was hoping that this would be a mild winter too.  Of course it isn't and now I need to stay warm.  After carefully examining them, two pair needed the linings replaced.  One pair needed the elastic removed from the waistline and a new one inserted. Finally a couple pairs were sent to the dry cleaners. That left several pairs in rotation so I needed to change this situation.

As stated previously, I've made five pair of lined black wool crepe pants ~ one pair of them are pictured on the left. These became a staple in my winter wardrobe because they provide such a great foundation for adding tops, twinsets, sweaters to complete an outfit.  

There were two pairs of black wool crepe pants that needed to be repaired.  The fashion fabric was fine - no tears, rips or stains so I wanted to preserve the fabric. The lining in one pair was in total shreds and the other pair looked like this...

Shot of the inner thigh shredding

Close up of the shredded lining in the thigh area

I could cut out new linings and add them to the pants or I could change my lining technique for something that would last a little longer.  I'm going with changing my lining technique so that I won't have to repair these as often.  Now, do I flat line or underline?

Lining versus underlining

"A lining is a complete separate "garment" attached to the inside and secured at one or more places such as the waist or the hem.  An underlining is an additional layer that is added to each part of the garment before it is constructed.  On a lined garment, the seams will be concealed, but on an underlined garment they will be visible."

~ from the Lining Chapter in The Dressmaker's Technique Bible

Flat Lining Techniques were discussed in this blog post on pants or can be found in Threads Issue #42, page 58.  If you have the Threads Magazine Archive DVD, the article gives you a step by step description on how to flat line a garment. There is also a great article about underlining in Threads Issue #68, page 37 written by Sandra Betzina.

First let me share the items I'll use to remake the pants...

Stretch elastic, black bemberg lining, Hug Snug Seam Tape

As I mentioned previously, after wearing a pair of flat lined pants versus wearing the underlined pair, I'd rather wear the underlined pairs because they are less irritating to my inner thighs.  Back to the deconstruction...

Reconstructing the pants...

First the lining is carefully cut out.  It's the easiest & fastest way to get it out of the pants.  I toss this.  I guess it could be saved for future projects but why?  So in the garbage it goes.

Removing the lining by cutting it out

Old lining trashed

Next the elastic comes off. Now this is a process - its kinda involved getting five rows of stitching out, especially in black fabric.  I normally do this while watching a movie/tv show so that I don't mind the time it takes to remove it.


Then I rip the pants apart and iron the fabric flat...holding onto the rayon bemberg tape from the hemline to reuse.

Finally I lay the front and back pattern pieces on the lining material and cut new pattern pieces.  I will be honest here, sewing books advise against using this technique for a variety of reasons.  Me, I use this technique all the time and have no problems BUT I feel it's prudent to tell you that it's not the accepted technique.


After the lining pieces are cut out, I pin the lining and fashion fabric together. The pieces are taken to the serger and serged together.


Then the pants are reassembled with the fabric and lining acting as one. 


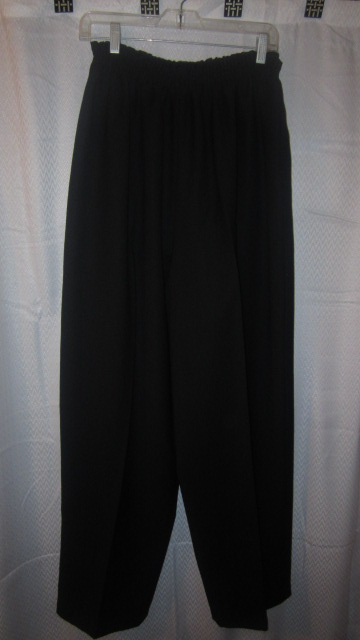
This is a hanger shot to show the finished pair of pants. However, I found a great piece of fabric in the collection so I'm going to make a quick cardigan to go with my remade pants.  I'll wear it with this white sleeveless blouse that I made last winter.


Hopefully this process was helpful to someone!  I can tell you that this is the "lining" method I will be using going forward for my pants/trousers.  And now that I have two remade pairs of pants plus the new gray pair in my wardrobe, I'm moving onto something else. 

...as always more later!


Friday, February 22, 2013

"Carolyn Inspired" by Denise...

I was thrilled when I opened my mailbox last night and discovered this...


Front view


Rear view

Yes, that's Denise aka "Andsewitgoes" modeling her Carolyn Inspired Top.  I think Denise explains it best...

I swooooned over your Erdem Inspired Dress post. So much so that I am sending you my 'Carolyn Inspired Top'.  

A couple of notes about the top.  There were many firsts for me:
  • I mixed a woven with a knit.
  • The front being the woven and the sleeves and back from the black knit.  I was worried that the knit would stretch so I used strips of interfacing to stabilize the side seams. Another first for me.
  • I also used the interfacing to stabilize the shoulders (This was a tip I learned from you!)
  • Another first was mixing two patterns. Most of it is my TNT top: Buttterick B4290 but I wanted a modern take on it so I used the back pattern piece to elongate and curve the back hem...
I love mixing patterns and got the confidence from reading all your wonderful posts.  Thanks for all the inspiration!

********************** 

Denise you are so welcome!  And the top is gorgeous!  The offer is open to everyone who reads my blog.  If you are inspired to sew something by a garment I've made, please feel free to leave a link in the comments or forward it to me. I will gladly feature you here and/or link back to your own blog!
I love when we as a sewing community inspire each other to achieve greater sewing feats and to improve our craft!

The pants post will be up next...

...as always more later

Wednesday, February 20, 2013

The last pair of pants in the City in Winter Collection

I saw this image in an email and the idea of the longer cardigan, white shirt and a pair of pants resonated with me.  As I said in my last post, I didn't have much of a sewing mojo until I decided to resolve the basics issue in my wardrobe.  So this idea touched my creative nerve and brought my sewing mojo roaring back...on the last day and a half of my sewing vacay!  *LOL*

There is nothing new in the construction of these pants.  I started with my TNT pattern...so for all of you looking for pant fitting info., I have none to offer in this post.  I started working on this pants pattern almost 15 years ago and in the interim I've enlarged it to fit my growing abdomen/behind, changed the size of the legs and added length as needed.

I did add a half inch to each side of the front pieces only.  Some days I need a little extra in the abdomen and some days I don't. But I'd rather my pants have a more trouser fit than a pants fit...me and tight aren't besties like that!  I also added an inch to the hemline because I plan on wearing higher heels with these pants (but after seeing the pics, I think I'm gonna re-hem them a little shorter). 

Finally I lined them by serging the lining to the fashion fabric and then sewing the lined fashion fabric as one piece.  I finally settled on this application for lining pants for several reasons.

1.  I used the flat lining technique on a pair of pants two years ago.  I wear the pants but only when it's really cold and when I'm pushed up against the wall. By the end of the day that seam starts to irritate the heck out of my inner thighs.  I don't experience this with the serged seam.

2.  I haven't experienced lining failure since I started using this lining technique. Seriously!  It's probably because the two fabrics no longer work against each other.

3.  I'm tired of remaking pants.  My linings are shredding right at the inner thighs and I don't have this problem when the lining is serged to the fashion fabric.

Also, I love the heft the fabric has once the lining is attached directly to the fabric.  The pants feel weighter which is what I want in a pair of winter pants.  Don't forget that I wear elastic waist pants.  They just work for me and I'm now unrepentant about that fact!  *LOL*


Me attempting to "model" like the ad!
Why did my daughter think this was a good idea ~ LOL!

One more thing...I wear trousers and not pants.  Personally I abhor when pants cup the buttocks and give me a full view of what you're working with.  I like the look of trousers...where the pants fit the buttocks but then gently flow into the legs no cupping involved.  And for one time only...never to be seen again...I'm including a picture of the buttocks on my pants so you can see what I mean.


Lord have mercy can't believe I'm sharing this view with you!  *LOL*

I'm wearing these trousers with the cardigan which was the starting piece for the City in Winter Collection.  The cardigan is also the bridging piece bringing the brown and the gray pieces together. So there are now just two pieces left to finish in the City in Winter Collection...a skirt and a jacket from this gray wool crepe.  The two dresses and blouse are going away.  I have more than enough pieces in this collection to coordinate with each other so I'm calling it done when these last two pieces are sewn.

...more views...


See nothing exciting, sexy or slimming about these pants but very much needed in this weather!  BTW, based upon your comments, which I sooooo appreciate, my next post will be all about taking apart a pair of sewn-by-me pants and remaking them.

...as always more later!


LinkWithin

Related Posts with Thumbnails