
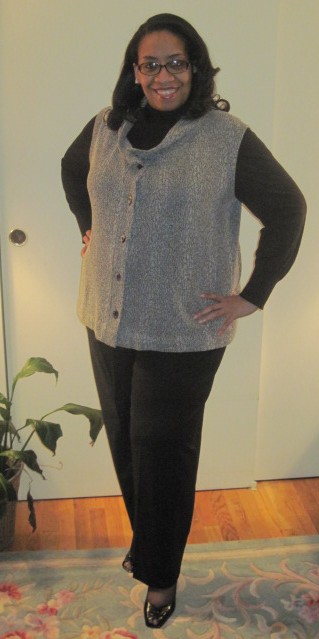
As stated previously, I've made five pair of lined black wool crepe pants ~ one pair of them are pictured on the left. These became a staple in my winter wardrobe because they provide such a great foundation for adding tops, twinsets, sweaters to complete an outfit.
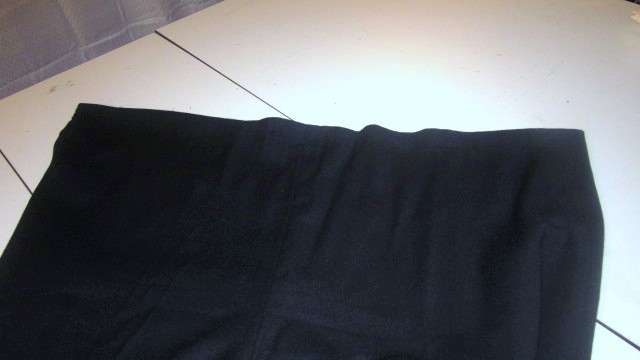
There were two pairs of black wool crepe pants that needed to be repaired. The fashion fabric was fine - no tears, rips or stains so I wanted to preserve the fabric. The lining in one pair was in total shreds and the other pair looked like this...

Shot of the inner thigh shredding

Close up of the shredded lining in the thigh area
I could cut out new linings and add them to the pants or I could change my lining technique for something that would last a little longer. I'm going with changing my lining technique so that I won't have to repair these as often. Now, do I flat line or underline?
Lining versus underlining
"A lining is a complete separate "garment" attached to the inside and secured at one or more places such as the waist or the hem. An underlining is an additional layer that is added to each part of the garment before it is constructed. On a lined garment, the seams will be concealed, but on an underlined garment they will be visible."
~ from the Lining Chapter in The Dressmaker's Technique Bible
Flat Lining Techniques were discussed in this blog post on pants or can be found in Threads Issue #42, page 58. If you have the Threads Magazine Archive DVD, the article gives you a step by step description on how to flat line a garment. There is also a great article about underlining in Threads Issue #68, page 37 written by Sandra Betzina.
First let me share the items I'll use to remake the pants...

Stretch elastic, black bemberg lining, Hug Snug Seam Tape
As I mentioned previously, after wearing a pair of flat lined pants versus wearing the underlined pair, I'd rather wear the underlined pairs because they are less irritating to my inner thighs. Back to the deconstruction...
Reconstructing the pants...
First the lining is carefully cut out. It's the easiest & fastest way to get it out of the pants. I toss this. I guess it could be saved for future projects but why? So in the garbage it goes.

Removing the lining by cutting it out

Old lining trashed
Next the elastic comes off. Now this is a process - its kinda involved getting five rows of stitching out, especially in black fabric. I normally do this while watching a movie/tv show so that I don't mind the time it takes to remove it.
Then I rip the pants apart and iron the fabric flat...holding onto the rayon bemberg tape from the hemline to reuse.
Finally I lay the front and back pattern pieces on the lining material and cut new pattern pieces. I will be honest here, sewing books advise against using this technique for a variety of reasons. Me, I use this technique all the time and have no problems BUT I feel it's prudent to tell you that it's not the accepted technique.

After the lining pieces are cut out, I pin the lining and fashion fabric together. The pieces are taken to the serger and serged together.

Then the pants are reassembled with the fabric and lining acting as one.
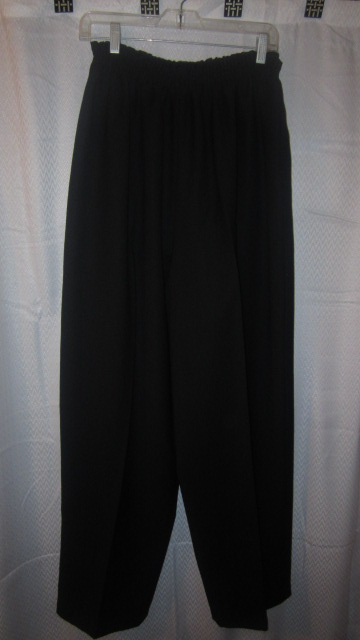
This is a hanger shot to show the finished pair of pants. However, I found a great piece of fabric in the collection so I'm going to make a quick cardigan to go with my remade pants. I'll wear it with this white sleeveless blouse that I made last winter.

Hopefully this process was helpful to someone! I can tell you that this is the "lining" method I will be using going forward for my pants/trousers. And now that I have two remade pairs of pants plus the new gray pair in my wardrobe, I'm moving onto something else.
...as always more later!

Thanks! Yes it is helpful and we appreciate it.
ReplyDeleteYou can tick those off the list. Well done. And you wil be feeling pretty good wearing those on cold mornings :)
ReplyDeleteVery helpful. Thanks!
ReplyDeleteHi Carolyn, thanks for sharing how you re-line your pants.
ReplyDeleteI have a small question re: serging together of the new lining fabric pieces to the existing, original fashion fabric layer please :)
Do you leave the server-blades engaged during the serging (and, therefore in the process trim-back the seam-allowance a little bit further back than the first time you stitched together the pants) please? Or, do you instead turn-off the cutting action of the blades; leaving them disengaged and just serge the existing cut-edges if the 2 fabric layers together please?
Many thanks,
Claire :)
Thanks for the instructions. I haven't lined pants yet but will definitely look this up when I do. Love the way you put the elastic on the pants. I must try that.
ReplyDeleteVery helpful post and would prefer your technique over thevstandard lining method. I am so drooling over the argyle fabric... pure fabric p♡rn.
ReplyDeleteThank you so much for this post. I've never made lined pants as I was too worried about how they were going to twist all up on the inside. This is the perfect solution. Brilliant!
ReplyDeleteGreat Post! The pants look great and I like them paired with the grey vest. Also thank you for taking the time to add all the links your posts and to the Threads articles. I will be lining skirts soon, so your post will give me some much needed confidence.
ReplyDeleteSpeaking of Threads...I see you are mentioned in the Mood Sewing Network article in the new April/May issue on page 79. Nice!
Thanks for taking the time to write this post and sharing the Threads resources. I've only lined one pair of pairs with a separate lining. I think that I will prefer the underlining method.
ReplyDeleteNice idea. Thanks
ReplyDeleteThe process is well worth the time spent.
ReplyDeleteI think from now on I'll underline my pants. It looks good, easier to do and it the soft fabric will feel good on my skin.
ReplyDelete~Sewjourner
I'm a fan of underlining, too!
ReplyDeleteHello,
ReplyDeleteI wish I had your courage... I now live in a place where there is snow, and my best winter pant has it's lining in shreds like yours...
But don't you think it's a bit too warm when you stay inside?
Now, I just put some warm tights underneath my pants to go outside and remove them when inside. It's a lot of undressing every day!
Hi Carolyn.
ReplyDeleteI like how you've lined your trousers. I did this last year and enjoyed the feeling.
So now I'm curious. Where does 'Hug a snug' get used? Do you sew this in at the seam?
I'd love to test this out because if I know what to use it for, I'll buy it.
Cheers.
Maria