Monday, July 18, 2022

The Replacement Three

My favorite summer dress is my TNT hacked to death version of the Deer & Doe Myosotis Dress. I've made over two dozen of these. I slowed down a bit in the last 2 years because I owned so many.  Well I'm retiring a few now and needed a couple to replace them. To me it is the most comfortable summer dress EVAH and I can't imagine dressing for summer without them. 

Construction Information ~ 

o I did enlarge the bodice pieces a couple of inches and I lowered the bust darts due to my widening yet aging body. 

o The sleeves were also widened to encompass my arm girth. 

o I deliberately used smaller buttons in these three.  One of the things I noticed in some older versions is that the buttonholes stretch out more with the bigger buttons. I want these to last even longer so that's why I switched.

o I also made sure to add a snap between the bodice and skirt seam to insure that the fronts won't separate when wearing. It's not a major deal but it annoys me so I will make sure to include one in future versions too. 

Here are my new ones ~

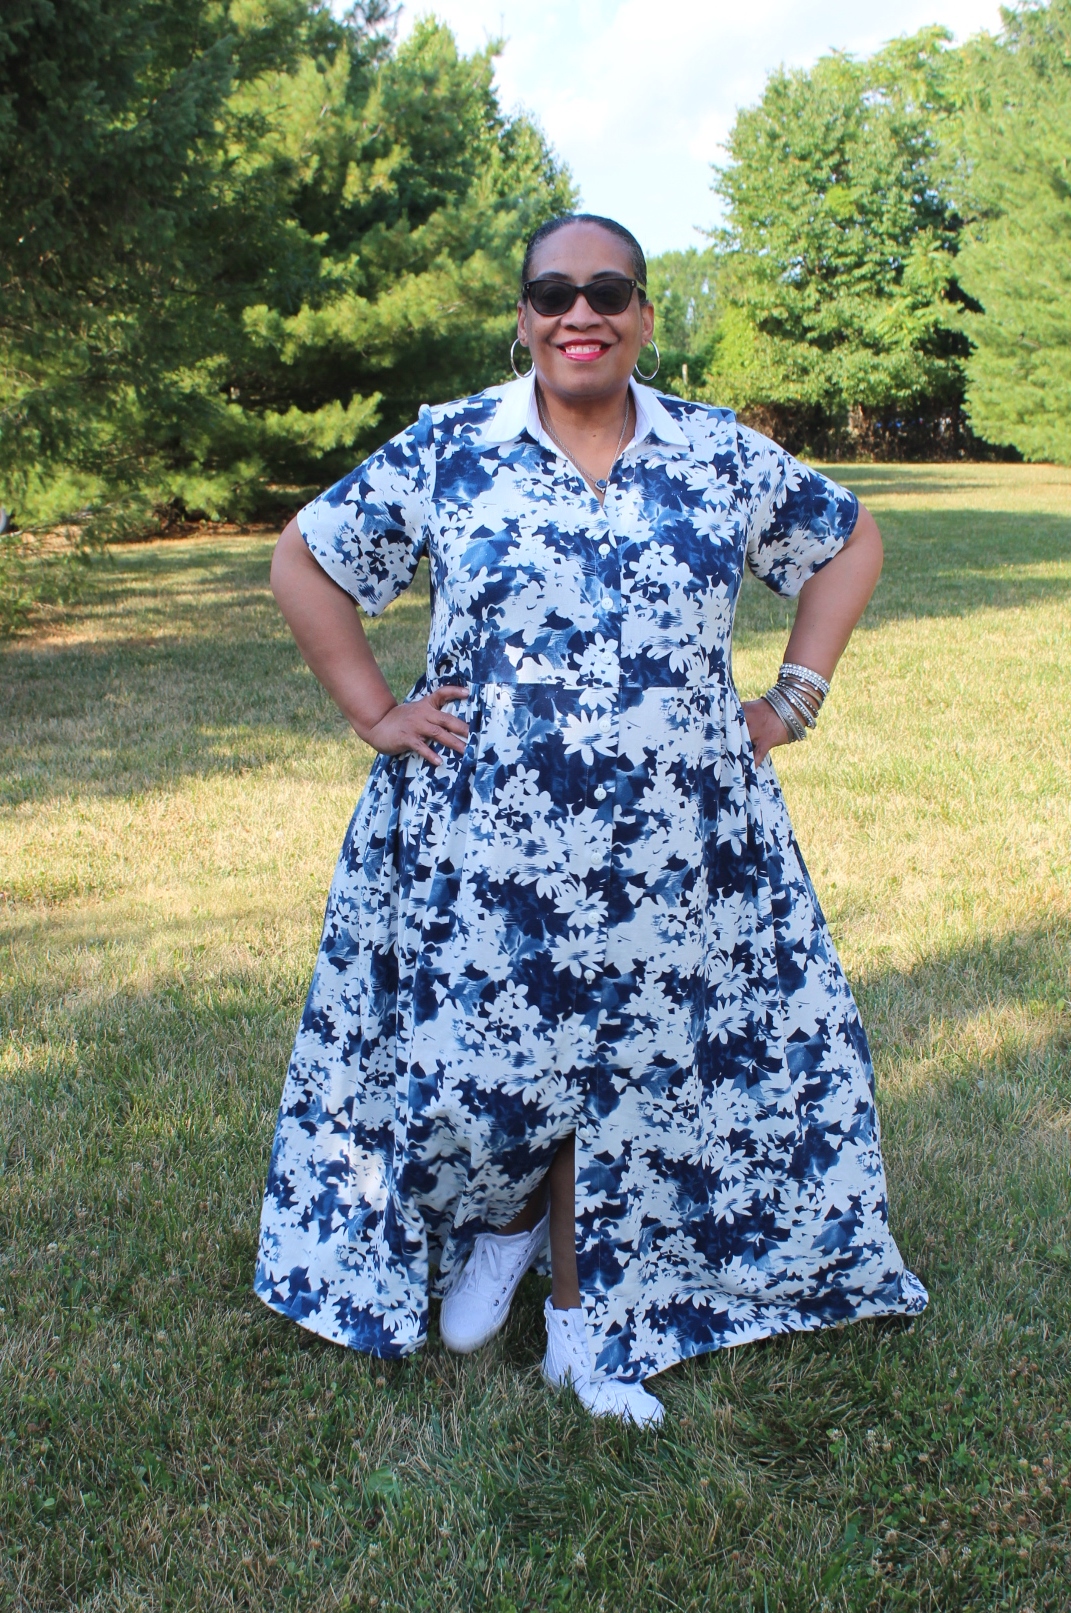
The Navy & White Floral Version

The main fabric is a rayon/linen from fabric dot com and is no longer available.  However, they do have it in a rose color that I may also own! The white accent linen is from JoAnns. The white buttons are from my button stash.


The Heart Version

The rayon/linen fabric is from Fabric Mart and is no longer available. The buttons were purchased from JoAnn's.


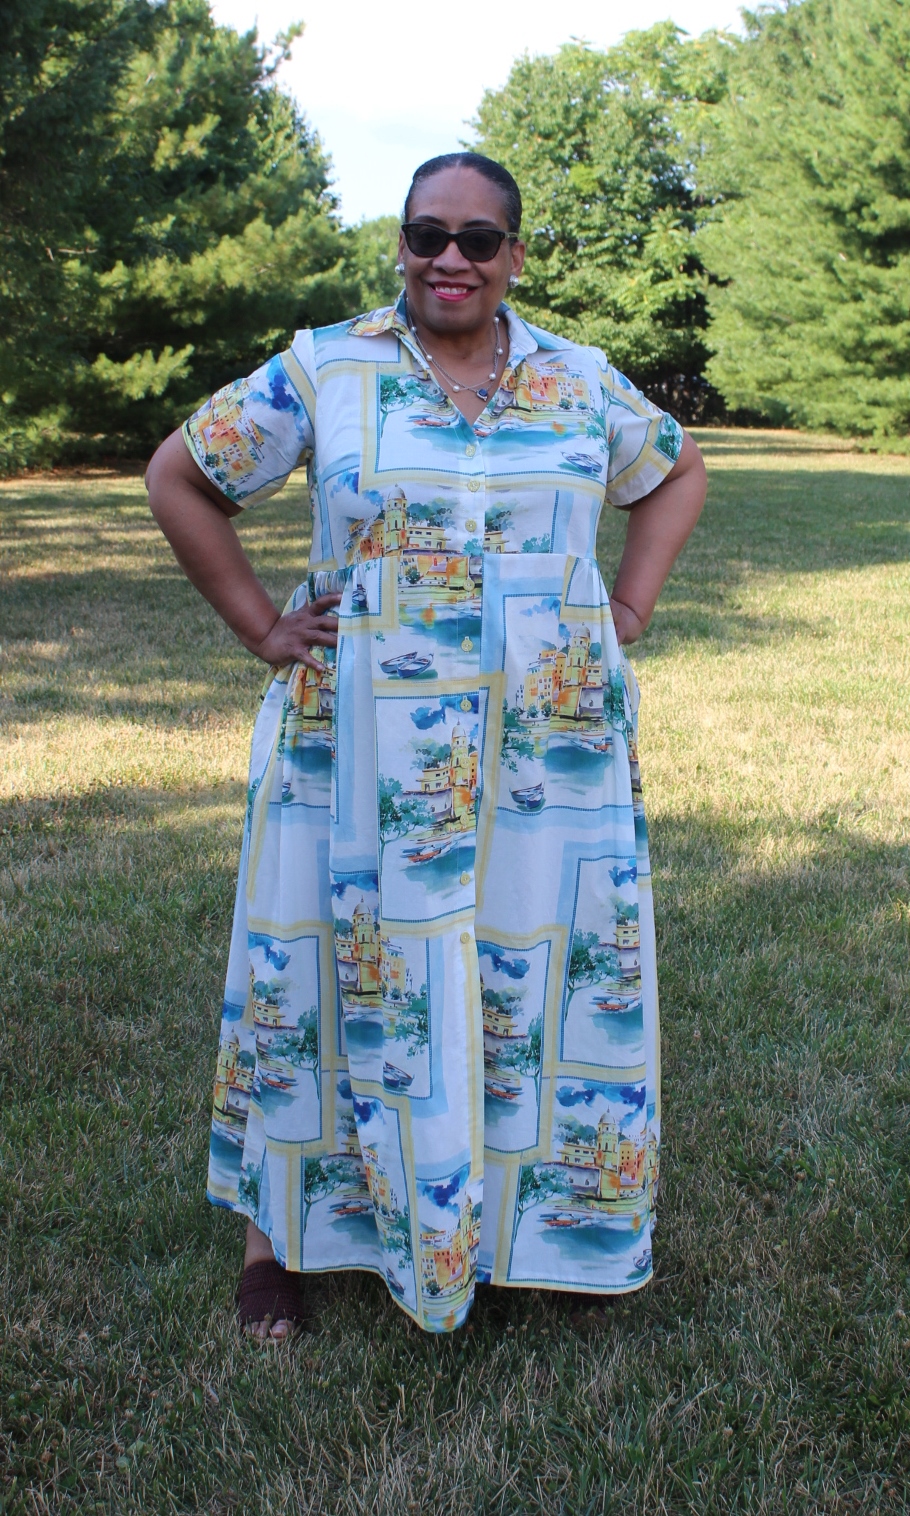
The Rivera Version

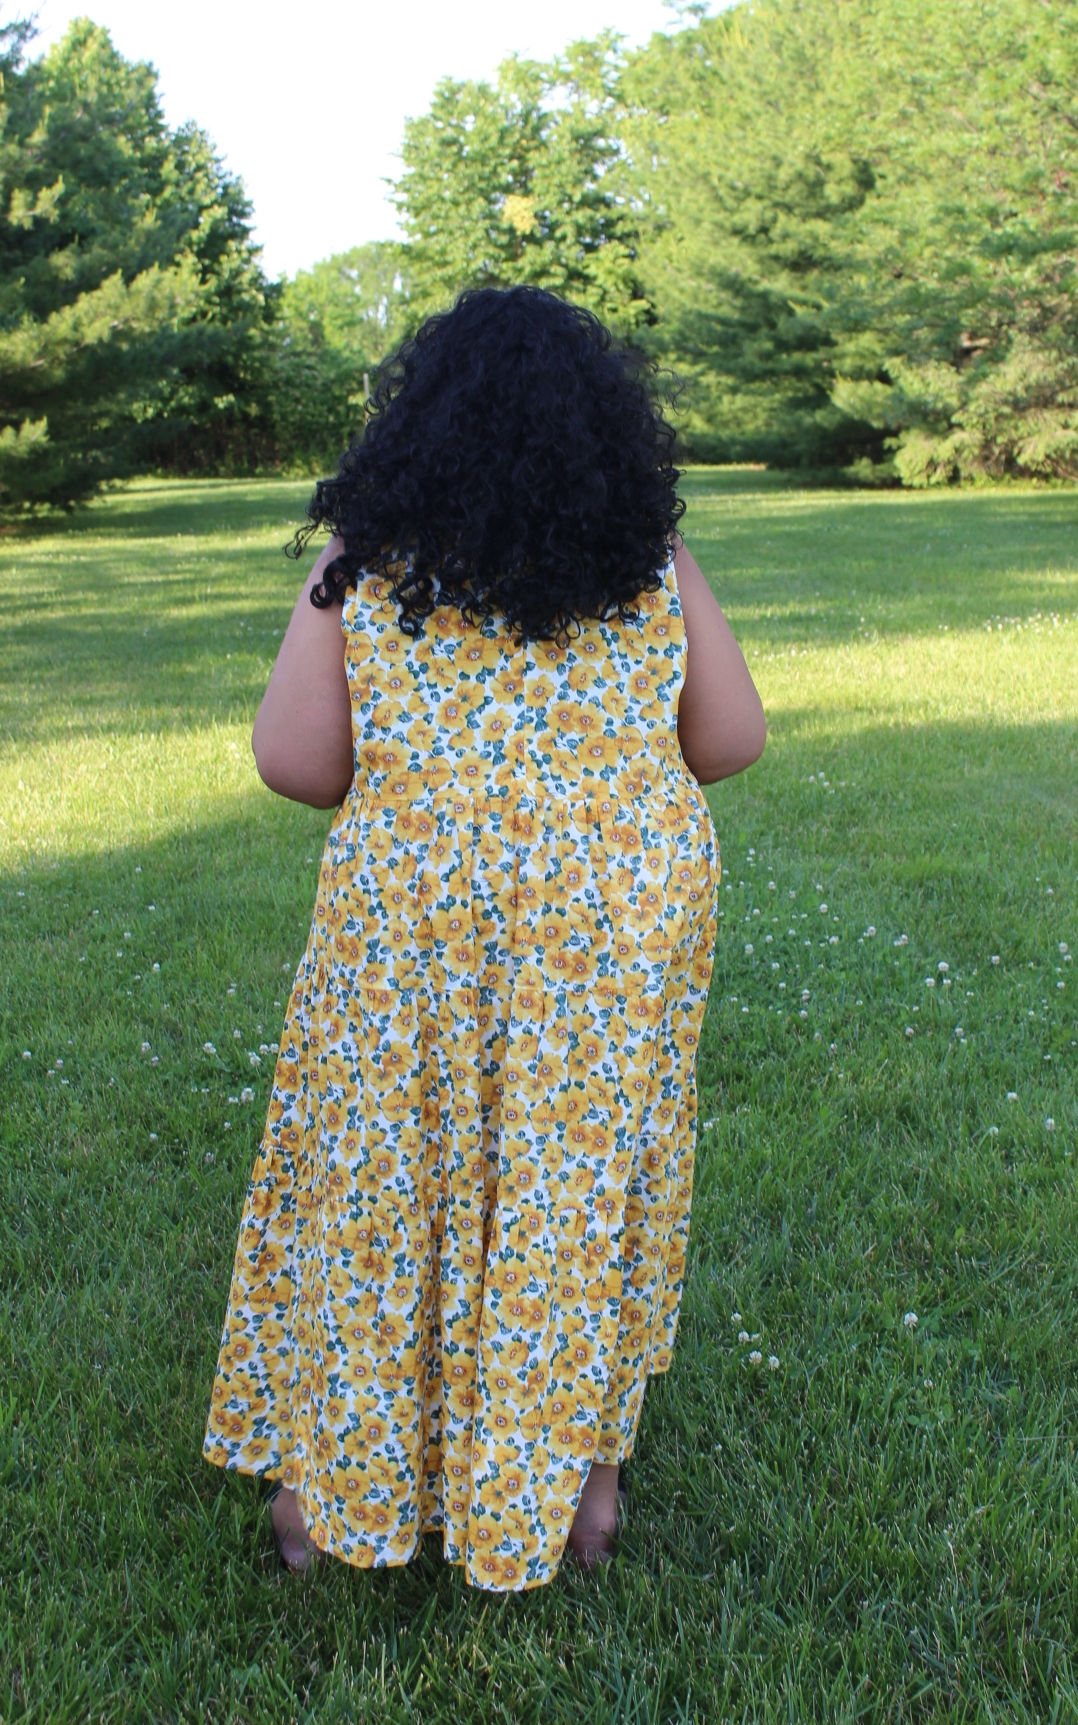
The cotton voile fabric is from Mood and is still available. The yellow buttons are from my button stash.


...and these are the ones I'm retiring. I've grown out of them and they will be donated.


Before & After because this one had already been altered once

I've also cut apart this one and altered another one. Those revisions will show up in future posts.

I have two more that I want to make this summer to round out the replacements. I will probably never retire this pattern...just make it as inspired going forward!

The sun is shining, the days are longer, it's warm outside but cool inside so my sewjo is back in residence. All this to say that there are more finished garments to share soon.


...as always more later!


Friday, July 15, 2022

Simplicity 8658 Again

I will admit that I purchased this fabric as I was working on my last version of Simplicity 8658. I loved the pattern that much.  Also there were all these versions floating around in my mind in a variety of colors and yes, more border prints.  However, since my sewing is wayyyyy slower than my fabric shopping these days this means I'm just getting around to it.  Also some of the design elements of my original idea have changed.

Materials ~

A cotton double sided borderprint from FM - purchased the end of 2021


11" beige zipper from the notions collection

Design & Construction Details ~

I used this border print differently from the last one.  I wanted the body of the shirt to have a more solid appearance. I didn't want the border print to be the featured aspect. So I chopped into the border print a bit.

Using the floral print for the neckline and raglan sleeves and the striped portion as a band around the bottom of the top.


After playing around and getting the design I wanted, this sewed up quick. If I'm being honest, it was finished in May. It missed the last photo shoot because I get tired after shooting too many outfits...just tired of the process. However, my daughter & family are going on vacation and she won't be available again until the end of July/beginning of August. So I put on my big girl panties and had her take pictures of everything I have completed.

A Few Photos ~


I may make this again come fall...but it's shelved for now because I still have a bunch of summer dresses to sew! It's a very versatile pattern and I highly recommend it.

A Reminder ~

If you leave a comment as Anonymous, please sign your name at the end of it. I don't respond to comments that don't have any name attached to them.


...as always more later!


Monday, July 11, 2022

It's all about the fabric...

I saw this fabric online back in late January when I was making my housedresses. I thought it would make an excellent one to wear around the house.

It's a cotton/spandex jersey knit. I purchased some...but I thought I was buying by the panel...and it ended up being by the yard. So the fabric sat while I waited for the weather and my attitude to change. It ended up being just a tad expensive to wear around the house. While I deserve to look good ummm not this good.

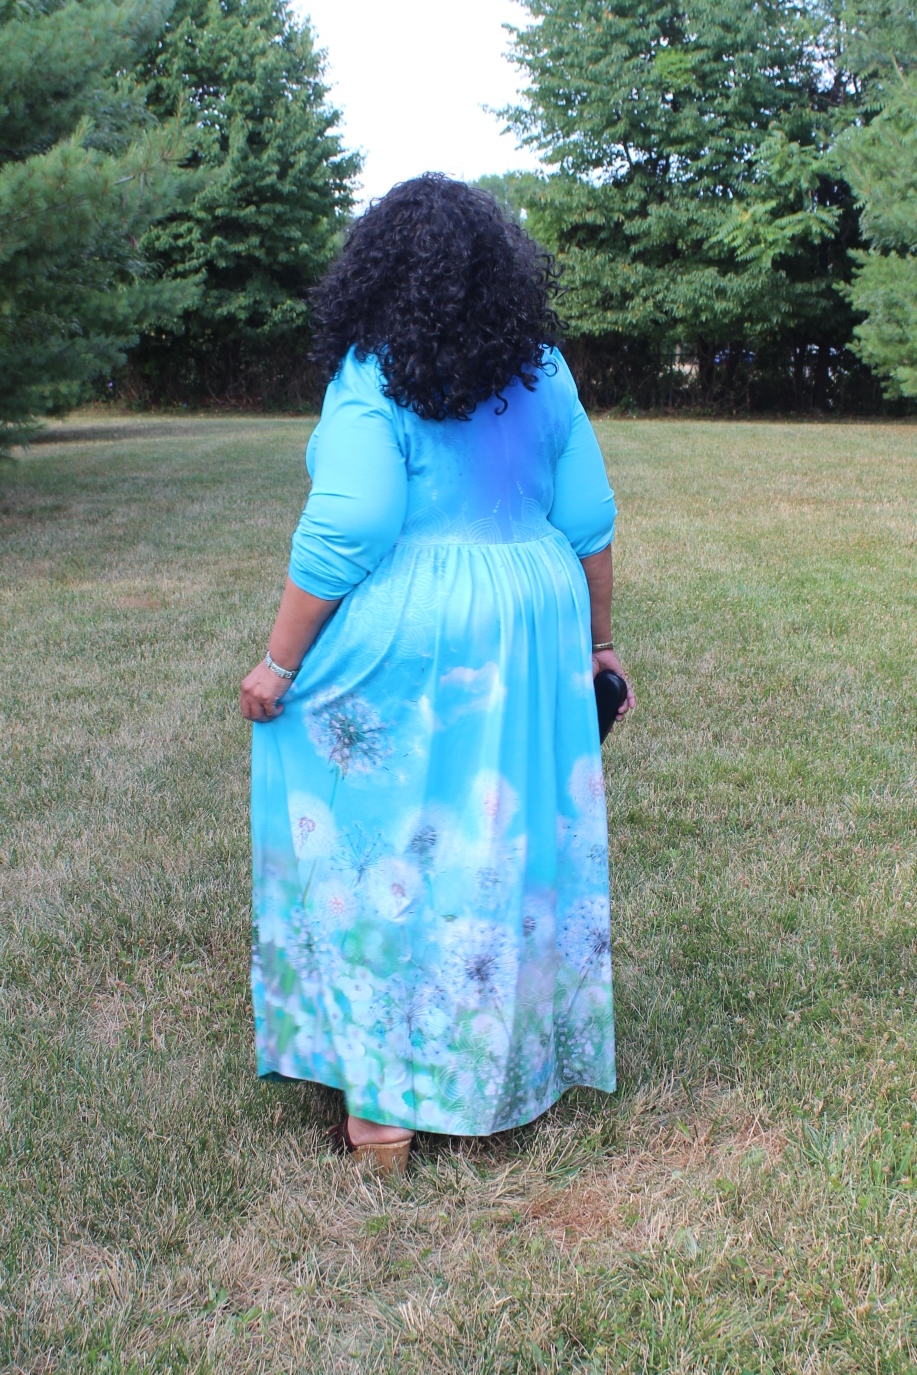
Now I thought this was an amazing panel print, I just didn't realize how amazing it was until I sewed it up. But may I state here that it was challenging to control the rolled edges and I cursed the fabric out several times during the construction stage.  

But it was soooooooo worth it...

This is my fourth version and I have nothing new to add to it's construction. The bodice is from Cashmerette's Washington Dress, the sleeves are from Cashmerette's Pembroke wide bicep version. The skirt is just the full width and the length of the fabric (42" for me) gathered onto the skirt and hemmed. This is a really easy sew. The finished dress is amazing because of the panel print.

A few more photos ~


I have fabric to make more of these when fall/winter returns. Indoor fabric! LOL! However, this one turned out so well that I'm planning to wear it to the NYC Frocktails in October!


...as always more later!


Sunday, June 19, 2022

Simplicity 8875 - Did Not Work for Me

Let's start with the fact that this dress pattern does not fit me.  I knew this when I purchased the pattern. But I liked the silhouette and I thought the alterations to make it work would be simple to do. Also because of the pandemic, I've been trying out some new silhouettes. I have time to sew styles I'm uncertain about and this was one of them. This post is to admit that my changes did not work for me. 

Now if you're an advanced beginner or beginner sewist and plus size, I would not recommend making this pattern unless you want to make a lot of pattern alterations, add in a little frustration and maybe come out with a questionable result. Please note that the largest size of this pattern is a US size 22/UK size 48.  Finished bust measurements are 44", waist 37", hips 46". At the time, I wanted the challenge of of trying to make it work.

Let me be clear.  I do NOT always want to take the time to alter a pattern but every now and then I find one that sets my creative juices on fire so I go for it. Please also note that this works for me and I'm in no way endorsing it for others to do. Each person's sewing journey should reflect what works for them!

Finally, there is ALOT of information contained in this post. So if you're not interested in the pattern changes I made, skip to the end. When I start a new project, I start a post for it so I can document my pattern changes/alterations, design changes when they're fresh in my mind. This post was started last year when I started this project that's why there is so much pattern alteration information.

Pattern ~

Supplies ~

5 yards of a rayon challis from StyleMaker Fabrics

22" white invisible zipper

1.5 yards of 7/8" white elastic

Midweight fusible interfacing from Steinlauf & Stoeller

Pattern Alterations ~

I altered almost every piece of this pattern.  So let's work our way from the top down. Please note, this is how I altered the pattern pieces.  I am not a professional. After years of sewing I know what works for my body.

Bodice Pieces:

o First I took my under bust measurement to use to figure out how much space I needed to make the bodice fit. It was 48" with an inch of ease.  The bodice front needed no alterations because I took the part that was supposed to be gathered and used it for space on my body.

o To the back piece I added to the side back to give more space to my body. It's a fitted piece. I don't need it fitted, I need it to fit me!

Body front and back:

- I started with taking my waist measurement both standing and sitting. I need 53" or 54" for comfort both standing and sitting.

- The pattern pieces measure 44" before seam allowances are omitted (2")  because I'm using 1/2" seams. So I need to add 11" or 12" to make these pieces fit comfortably around my waist.  

I added 3" to the front and back pieces to get my 12". I deliberately added the inches to the center of both pattern pieces because that's where I need the additional fabric.

After adding the additional space, true up the top and bottom hems on both pieces.

Bottom Ruffles:

Add the same 3" you added to the front and back piece to the front and back ruffles.

Sleeves:

I went with the shorter length sleeve.  Then I slice and diced it to widen the width. I added some length (which I removed) so I could add a casing to make it a puffier sleeve.

Construction ~

It's not a difficult dress to construct.  Honestly I didn't pay much attention to pattern matching either just made sure all the pattern pieces faced the same direction. That worked for getting the pattern to work across all of the pieces.

Three things you should note:

o I did not put the neckline facing on as the pattern suggested.  I used the method I've always used and that worked for me. The way the instructions said to do it, confused me honestly.

o  I changed up the sleeves.  The pattern has a pleated puffy sleeve.  I added enlarged my sleeves then added elastic to the hemline.

o  To make the enlarged back skirt pieces fit my bodice, I added a line of gathering on either side of the zipper.  You don't even notice it in the finished dress.

Besides the gathering and my mis-cut, it was an easy to sew together.

Some Pictures ~


This is a snug fitting dress. Not tight but very fitted. I don't really do very fitted and have challenges with it. I'm sure if we weren't living in an pandemic world, I wouldn't have wasted precious sewing time to make this. However, with time on my hands...I went for it.  

It's been sitting in this condition for over a year now and I'm calling it. I had a feeling that I might have used a precious piece of fabric when I started this journey. So I promptly ordered another 5 yards of this fabric from StyleMaker Fabrics last summer. The fabric needs a garment worthy of it. 

Now I just need to decide to what to do with the fabric in this partially completed dress because I do not want to toss it. I also wanted to share that not everything works for me. I have failures too.


...as always more later!


Thursday, June 16, 2022

Altered an Oldie But Goodie - No. 2

I said in my last post where I altered a shirt that I would be redoing more pieces in my wardrobe. There's so much initial work in them and the style still works in my wardrobe so I'm loath to donate them.  This is one of them...

I made this Myosotis dress back in 2018.  It was the second one I made. As you can see because I was still using the original pattern details.

This is the dress now...

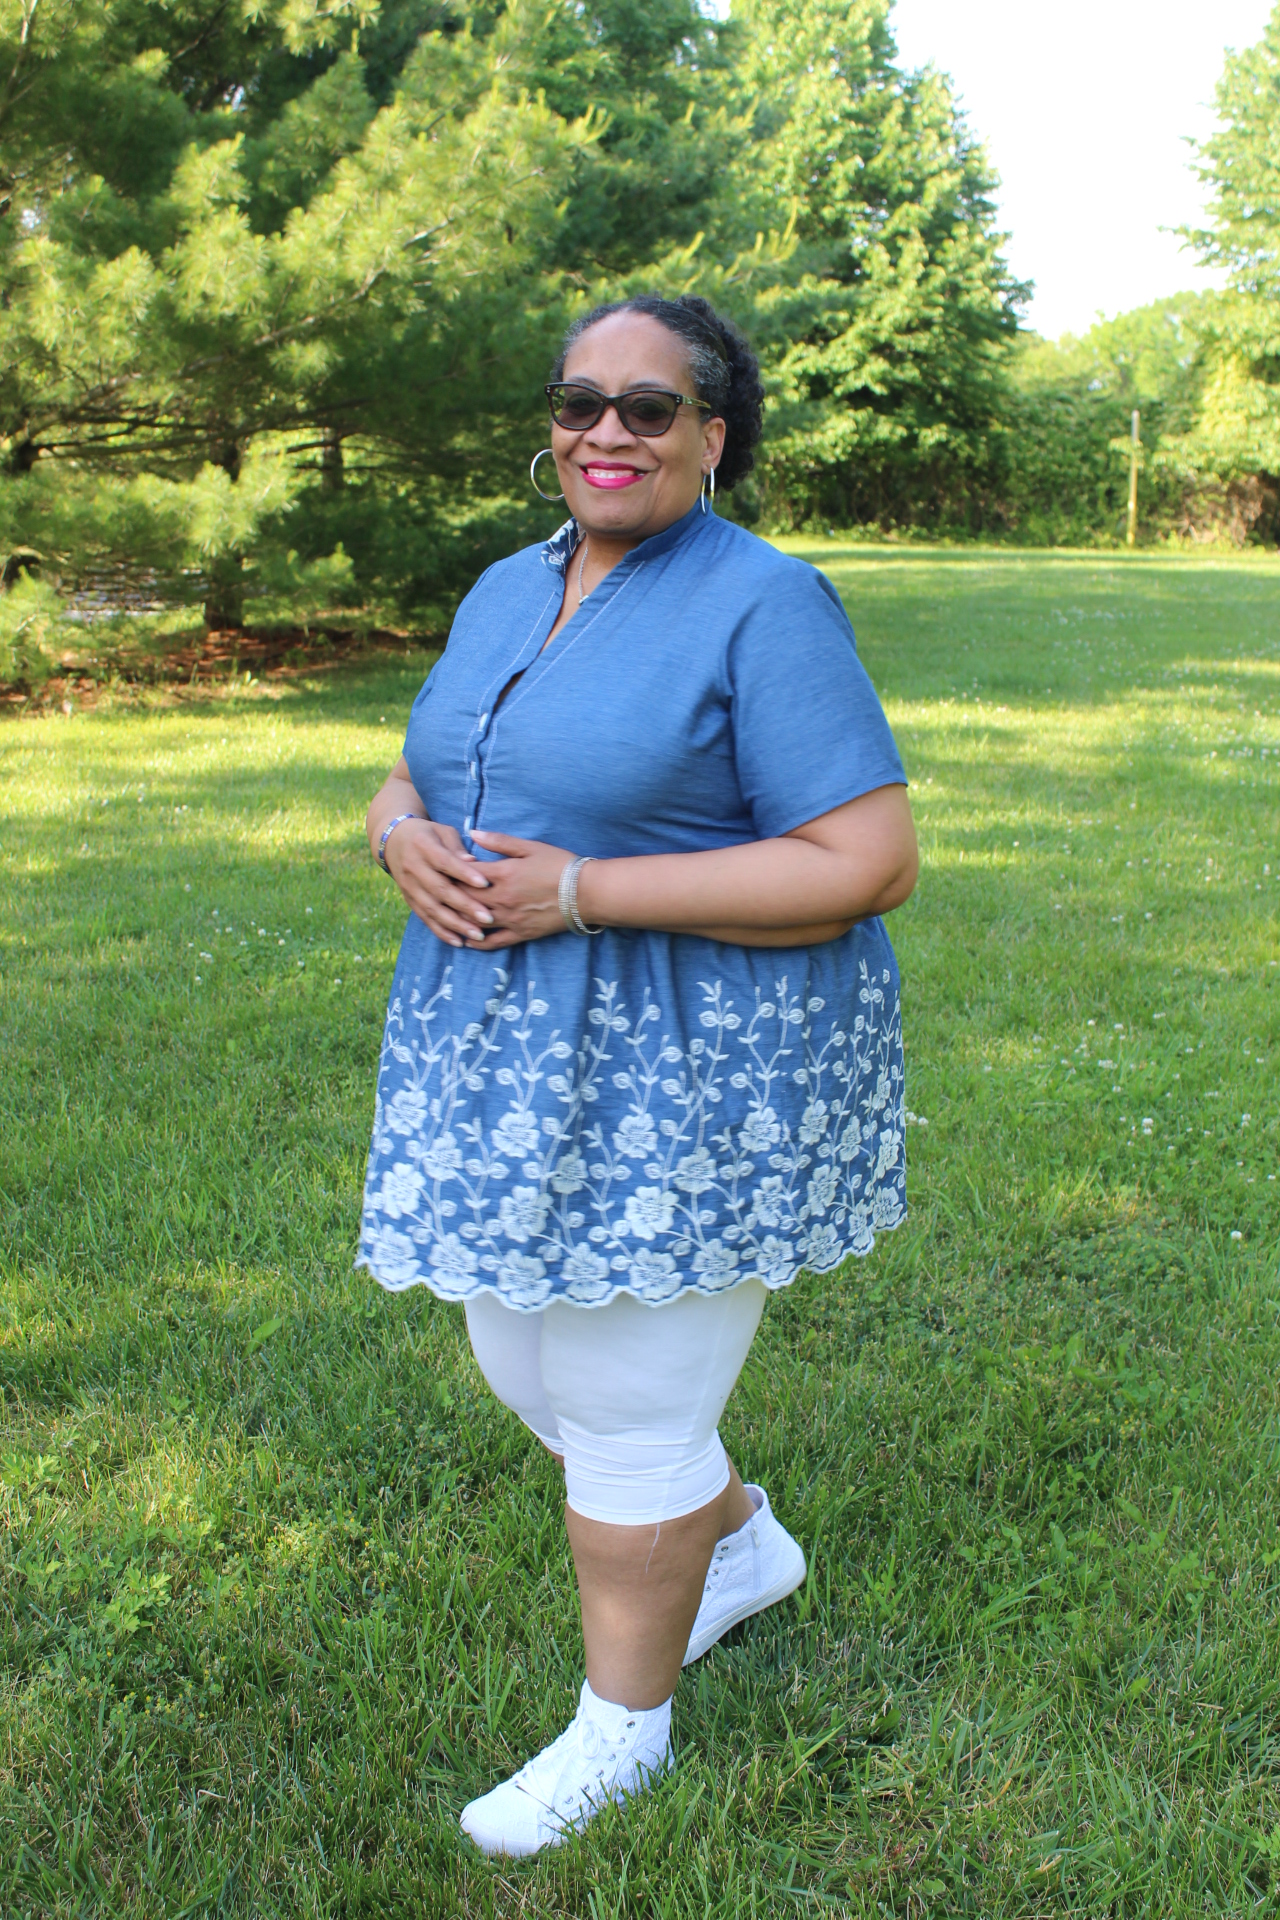
There were two challenges with it.  The bust and the sleeves both were tight. I took the dress apart and loosened the side seams on the bodice. It gave me an additional inch and a quarter. 

Then I recut the skirt taking off 17" to make it more tunic like. 

I remade the sleeves using the top of the remaining fabric from the skirt. The original sleeves had white topstitching on them to echo the white topstitching on the bodice front. I omitted that this time.

Otherwise, it was a one day project. I tore it apart watching a movie Friday evening and put it back together Saturday afternoon.

A Few Photos of it now ~


However, after taking these pictures, I will not be wearing this out and about.  It will be a house top. While I made the sleeves larger and shortened the skirt, there just wasn't enough fabric to widen the bodice and it's so obviously pulling in the front and back. I may yet use the embroidered piece to make shorts for the granddaughters. It was a good effort to salvage this top but it's not quite there...


...as always more later!


Sunday, June 12, 2022

Style Arc Nova Dress

I wanted to try another tiered dress for Summer 2021 but this dress got pushed to Spring 2022.  I mean I own a bunch of Mysotis dresses and I wanted to use another pattern for a different style dress to add to my wardrobe. That's how my interest was piqued by this tiered dress. I know I've been sewing more Style Arc patterns lately but they have expanded their sizing and the designs fit my lifestyle. Casual with a fashion flair...

Last year I carted it to Sew Camp but didn't work on it. I thought I would have completed it by summer's end. However, by late September I realized it wasn't happening, so I set it aside.

Hello Summer 2022...

Supplies ~

4 yards of printed cotton from fabric dot com (purchased January 2021)

14" white invisible zipper

Gingham bias binding purchased during Sew Camp 2021

Pattern & Design Changes ~

This pattern is a slip-on dress that has a double fabric bodice and no closure. However, I did a few things differently...  

1.  I scooped the front and back neckline a little deeper on the pattern.

2.  I added a 14" invisible zipper to make it easier to get into the dress.  The back bodice piece was changed by omitting the cut on fold the pattern suggests. A 1/2" back seam allowance was added so I could insert the zipper.

3.  The double bodice was eliminated and I finished the neckline and armholes with some cotton gingham bias binding from the collection.

4.  The lower tier was lengthened by 4" to make it maxi length. I would add another 2" to this tier for the next version.

Those are all the changes I made.

A Few Photos ~


This is a simple sew and an easy to wear loose-fitting dress. The only thing to note is if you don't want to do a lot of gathering this dress is NOT for you. I don't mind gathering and even I had to take my time when doing it. It got a little tedious.

By the way, how do you gather?  For small sections of fabric to be gathered, I use the two stitching lines. However, when I'm gathering swaths of fabric like this, I zig zag over waxed dental floss. Waxed dental floss because it makes it easier to pull it through the zig zag tunnel and it doesn't break. The one thing you don't want is it breaking halfway through the gathering. Also why I don't use stitched lines. I've had the thread break on me and it ain't pretty!

THIS is the perfect summer dress.  As I wore it to take pictures, I thought I need another one or two of these in some of the pretty challis prints I own. So hopefully that will happen this summer. I just don't know because I have a pretty robust sewing list and another five garments in my cut pile.


...as always more later!


.

Thursday, June 09, 2022

The Infamous McCalls 7969

I finally understand why so many sewists have made this pattern. I also understand why they've made it multiple times. I'm not sure I understood in the middle of construction but once finished...I got it.

This is my version of McCalls 7969...

Supplies ~

4 yards polyester crepe purchased from Fabric Mart in 2021

Interfacing from Steinlauf & Stoeller

Construction ~

I chose View D the maxidress version with the flutter sleeves. Almost all the other sewists used the fantastic sleeves in View A which makes a stunning dress. View D was more me.

I made no pattern alterations. I cut this out and sewed it up. My only challenge was wondering how the crossover bodice worked. Once I got into making it all things worked out. A warning that crossover is low. I saw it but didn't notice it until it was on MY body! However, a tank top works and I rather like it like this.

A Few Photos ~


This will definitely be made again. It's an easy to construct and easy to wear dress. It dresses up nicely but I can also dress it down...and of course, I have plenty of fabric options to choose from to make it again!

If you own this pattern, I highly recommend you making a version of your own. I know the trendy sleeves drew most sewists to the pattern but there are other views that can also be used. If you're looking for an easy breezy summer dress - this one is it!


...as always more later!


Sunday, June 05, 2022

Can We Talk?

I was sharing a photo with a friend about a garment in progress and she responded, "Oh my goodness, I thought you traced patterns?" My response was do you know me?  I'm definitely "Team Cut that Sh*t Out!"  We've been friends for over a decade. She sees everything I'm making before it's shared on social media.  We talk about fabric and what to buy and what not to buy and I couldn't believe she didn't know me! Or rather how lazy I am! *LOL*  

It got me to thinking. How many other sewists who have followed me for years have assumptions about me?  Well sewing assumptions.  Anything else I'm not that concerned about! *LOL*  Maybe it's time to debunk a few myths.

So the floor is OPEN.  Ask me anything sewing related that you think I may or may not do.  Please note this is sewing related. I DO NOT talk about where I work, what I do, my friendships or anything really personal.  This is the internet and it holds things FOREVER!  And believe it or not, some companies do check the internet for background checks for jobs, etc.  No, I'm not looking for a job but you never know...

So do you assume I make a muslin?  Do you assume I'm anal about pattern placement?  Or thread choices?  Or do you have a question about my processes? State your answers or questions and I will answer all!

This is not quite a Question of the Day...more like as Joan Rivers, bless her soul, use to say, "Can We Talk?"


...as always more later!


LinkWithin

Related Posts with Thumbnails